Table of contents
Open Table of contents
Introduction
Purpose
This write-up documents building a small NixOS fleet from scratch and running OpenBao on top of it, in three stages:
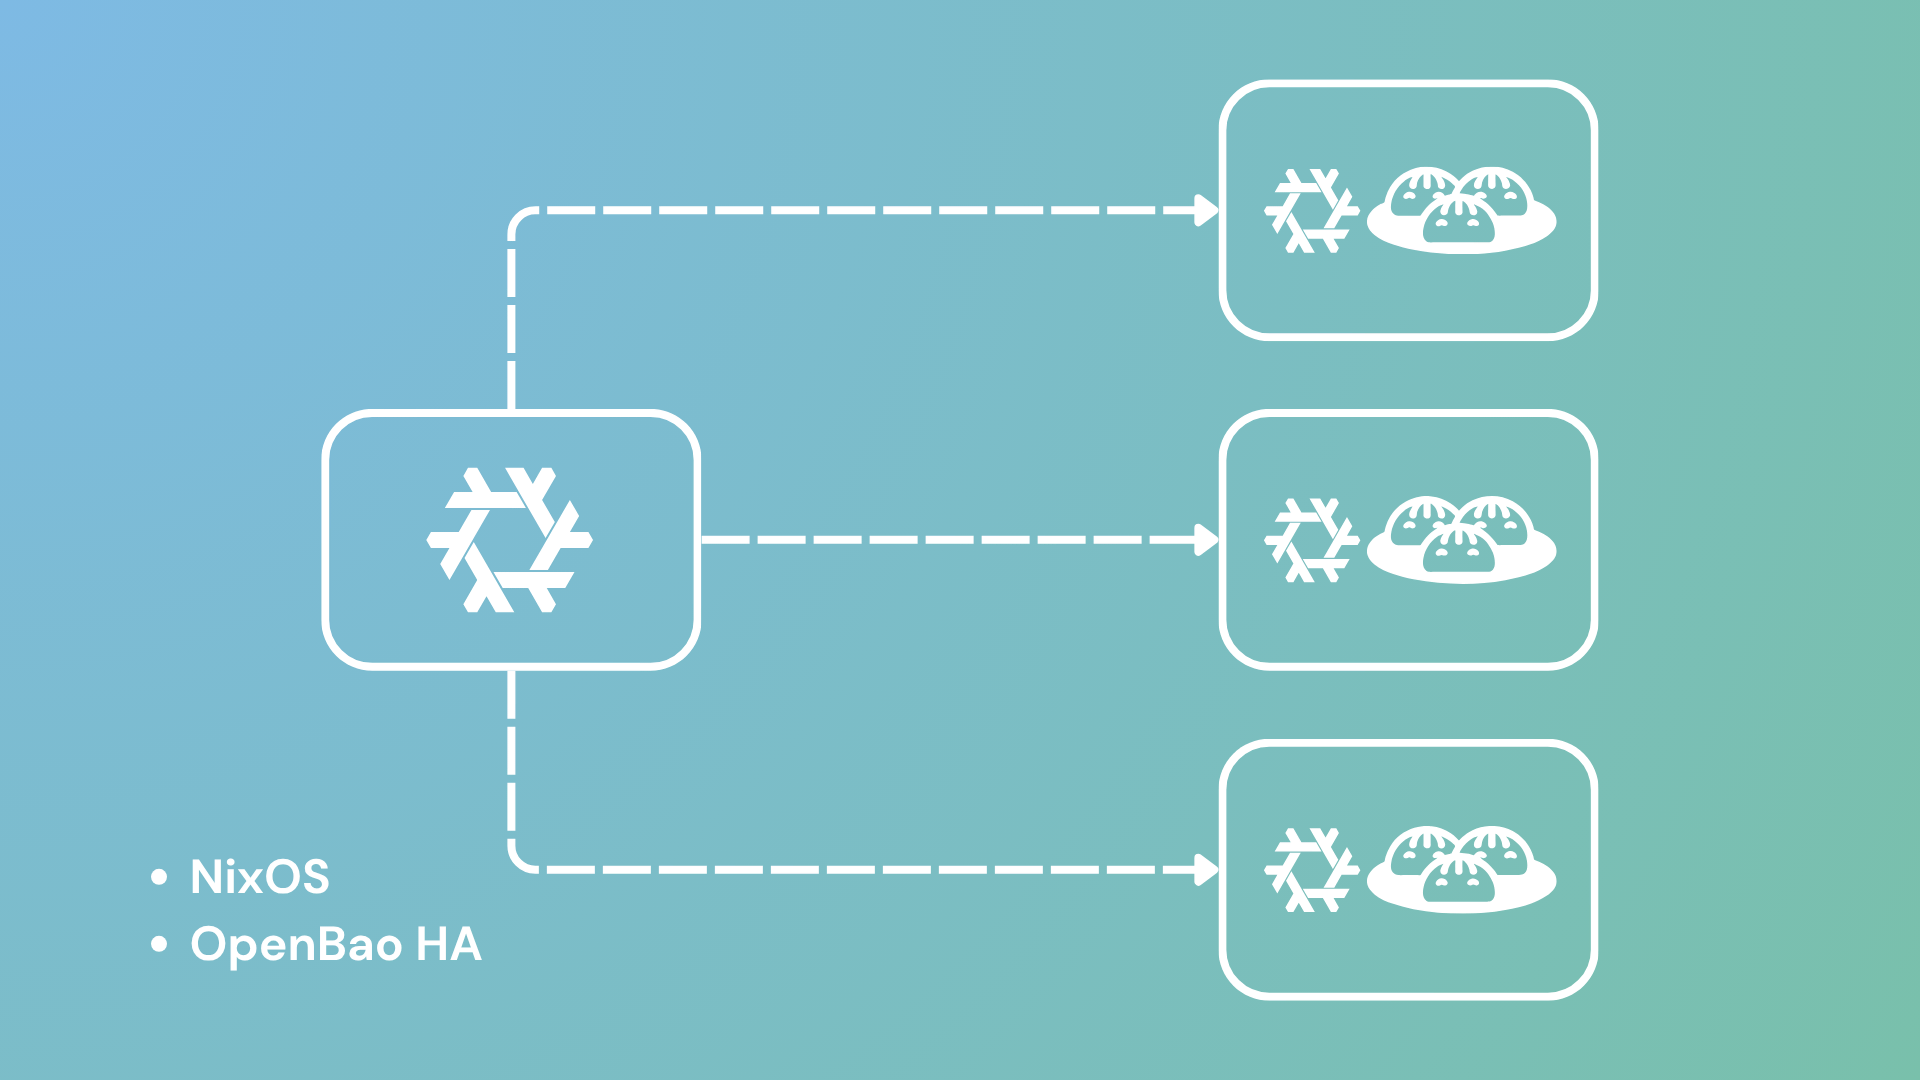
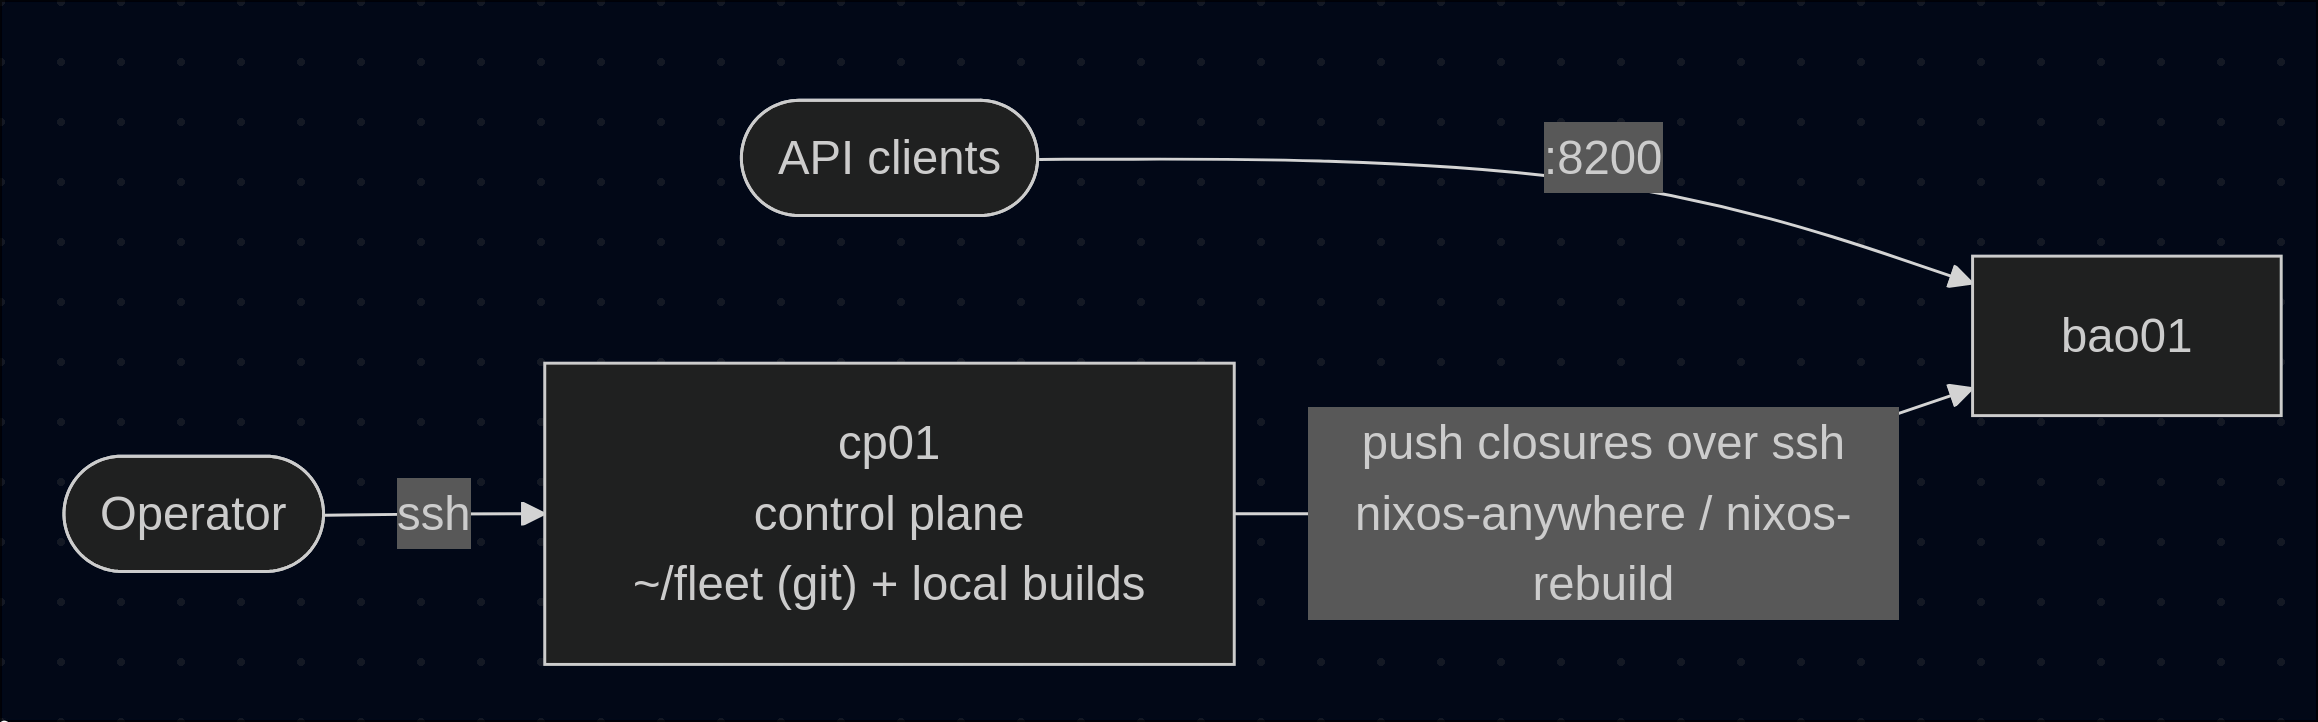
- Set up a NixOS control plane - a single flake-based host that holds the entire fleet configuration in Git, builds every system locally, and pushes the results to remote targets over SSH.
- Deploy OpenBao as a single instance - declaratively, on one of the target hosts.
- Upgrade OpenBao to High Availability - extend the single instance into an HA cluster across the remaining targets.
Prerequisites
- NixOS minimal installation ISO from https://nixos.org/download/
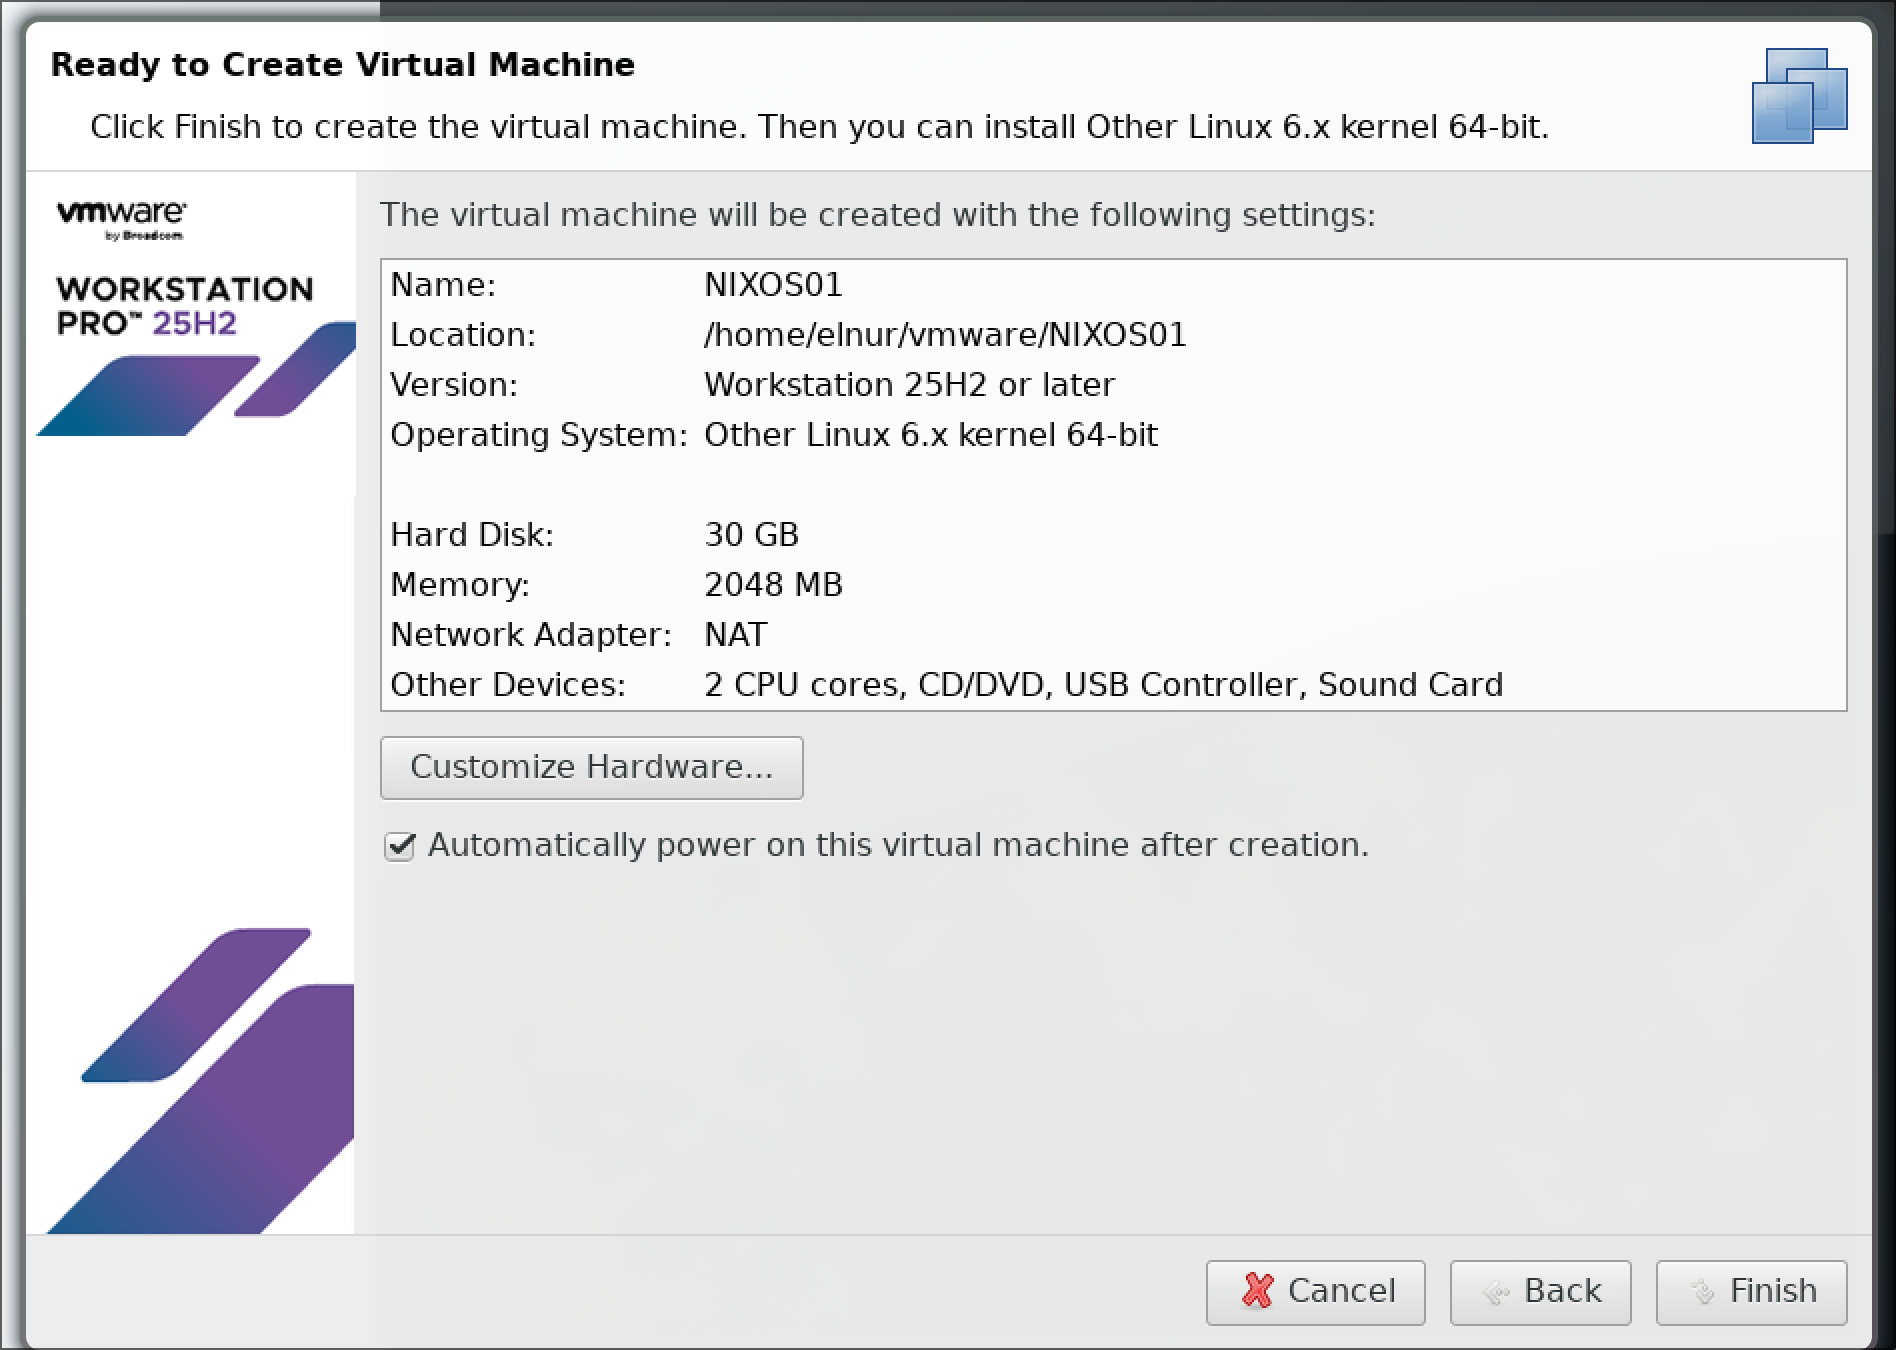
- 4 VMs for NixOS, each with:
- 2 vCPU
- 2 GB RAM
- 30 GB disk
- Basic familiarity with NixOS and OpenBao, each on its own
Background
What Is NixOS, and Why Use It?
NixOS is a Linux distribution built on top of the Nix package manager (the name comes from the Dutch niks, “nothing” - builds depend on nothing but their explicitly declared inputs). Instead of mutating a system imperatively through a package manager and scattered config files, you describe the entire machine - bootloader, kernel, services, users, packages - in a declarative configuration, and NixOS builds the system from that description.
For this project, that buys us three things:
- Reproducibility - every host can be rebuilt from the same Git repository and end up in the same state.
- Atomic upgrades and rollbacks - every rebuild creates a new “generation”; a bad deployment is one command (or one reboot) away from being rolled back.
- Configuration as the single source of truth - the repository is the documentation of the fleet.
For more information, see the official manual at https://nixos.org/manual/nixos/stable/, the learning portal at https://nix.dev, the community wiki at https://wiki.nixos.org, and the package/option search at https://search.nixos.org.
What Is a Flake?
A flake is the standardized entry point of a Nix project: a flake.nix file that declares inputs (dependencies such as nixpkgs, pinned to exact revisions in an accompanying flake.lock) and outputs (in our case nixosConfigurations - complete system definitions). Because every input is locked by revision and hash, the same flake evaluates to the same system on any machine - exactly what you want when one host builds for a whole fleet. Flakes are formally still marked “experimental,” but they are the de facto standard for modern NixOS setups.
The Role of the NixOS Control Plane
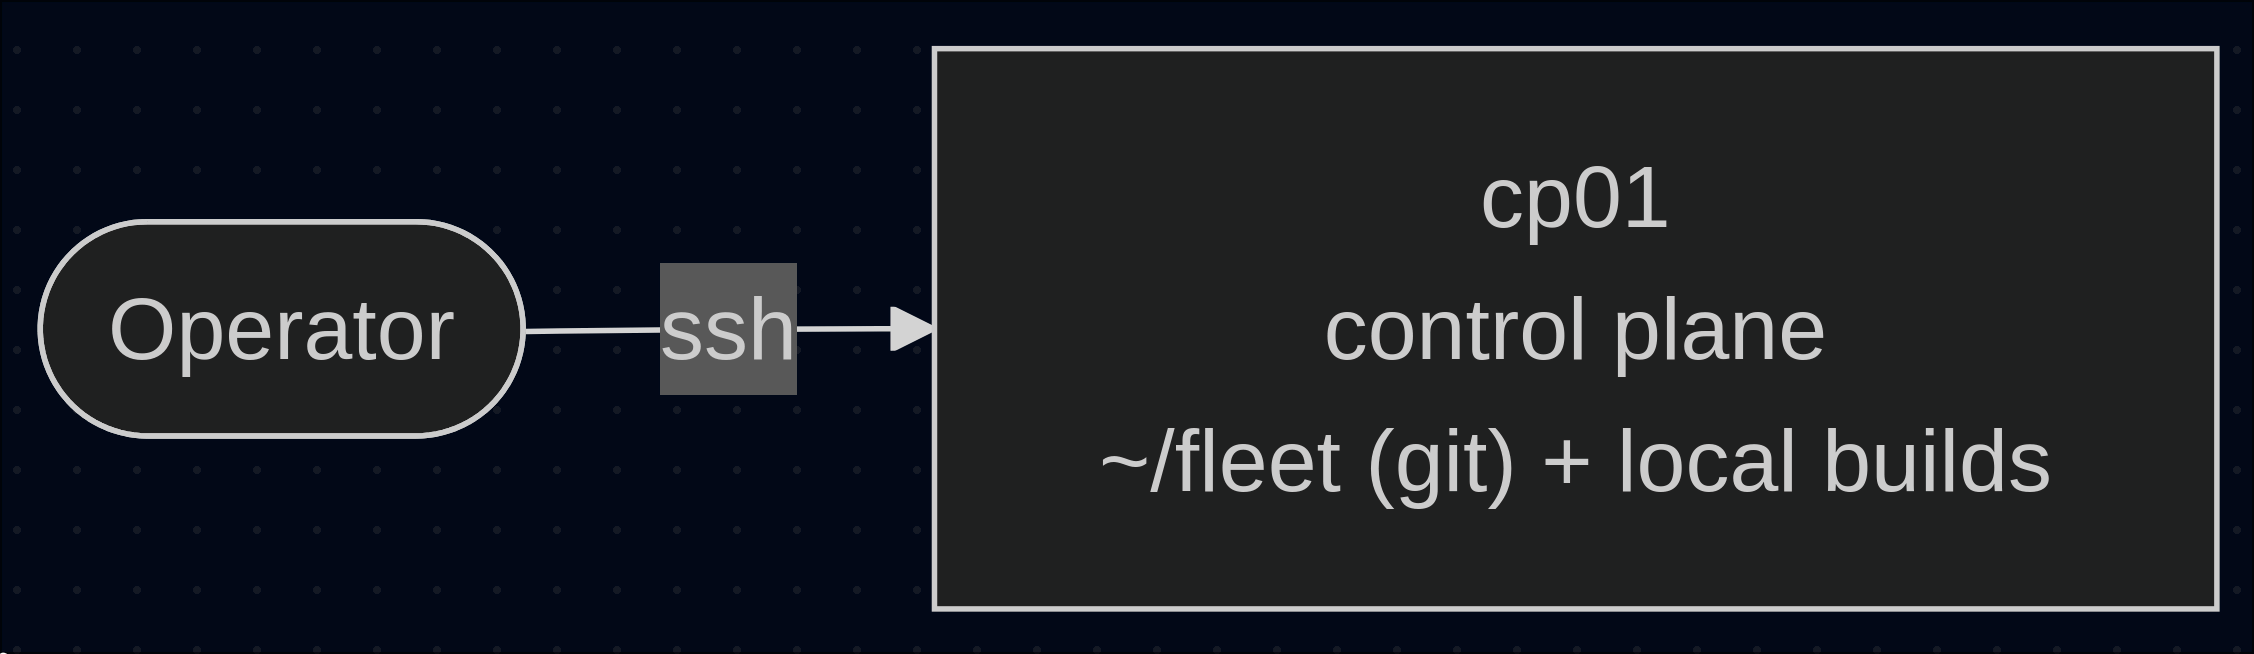
The control plane (cp01) is the only host we ever touch directly:
- It holds the fleet’s flake repository.
- It builds every target’s system closure locally.
- It pushes the finished closure to each target over SSH and activates it there (
nixos-rebuild --target-host).
The targets stay minimal - no Git checkout, no editing on the box, and no compiling, which matters with only 2 GB of RAM per VM. Conceptually, it plays the same role that tools like deploy-rs or colmena automate, just with plain nixos-rebuild.
Declarative Disks with disko
disko declares partition tables, filesystems, and swap as Nix expressions, replacing the manual parted/mkfs dance we did for the control plane. The disk layout becomes just another module in the fleet repository and is applied automatically during remote installation. Two details matter for our BIOS-booted VMs: disko can lay out a GPT table with a 1M partition of type EF02 (a BIOS boot partition), which is what lets GRUB boot from GPT on legacy firmware, and whenever an EF02 partition is present, disko sets boot.loader.grub.devices for you. Creation order is handled too: the EF02 partition is created first and the 100% partition last, regardless of how they are written in the config.
Remote Installation with nixos-anywhere
nixos-anywhere installs NixOS over SSH on any reachable Linux machine. It first detects whether the target is already running a NixOS installer; if not, it uses kexec to boot into one (the skip matters for us, since kexec needs at least 1 GB of RAM on top of the running system). It then runs disko to partition and format, builds the flake locally on the machine invoking it (cp01 in our case), copies the closure to the target, installs, and reboots. It requires either root on the target or a user with passwordless sudo - which the live ISO’s nixos user has.
NixOS Installation
VMware
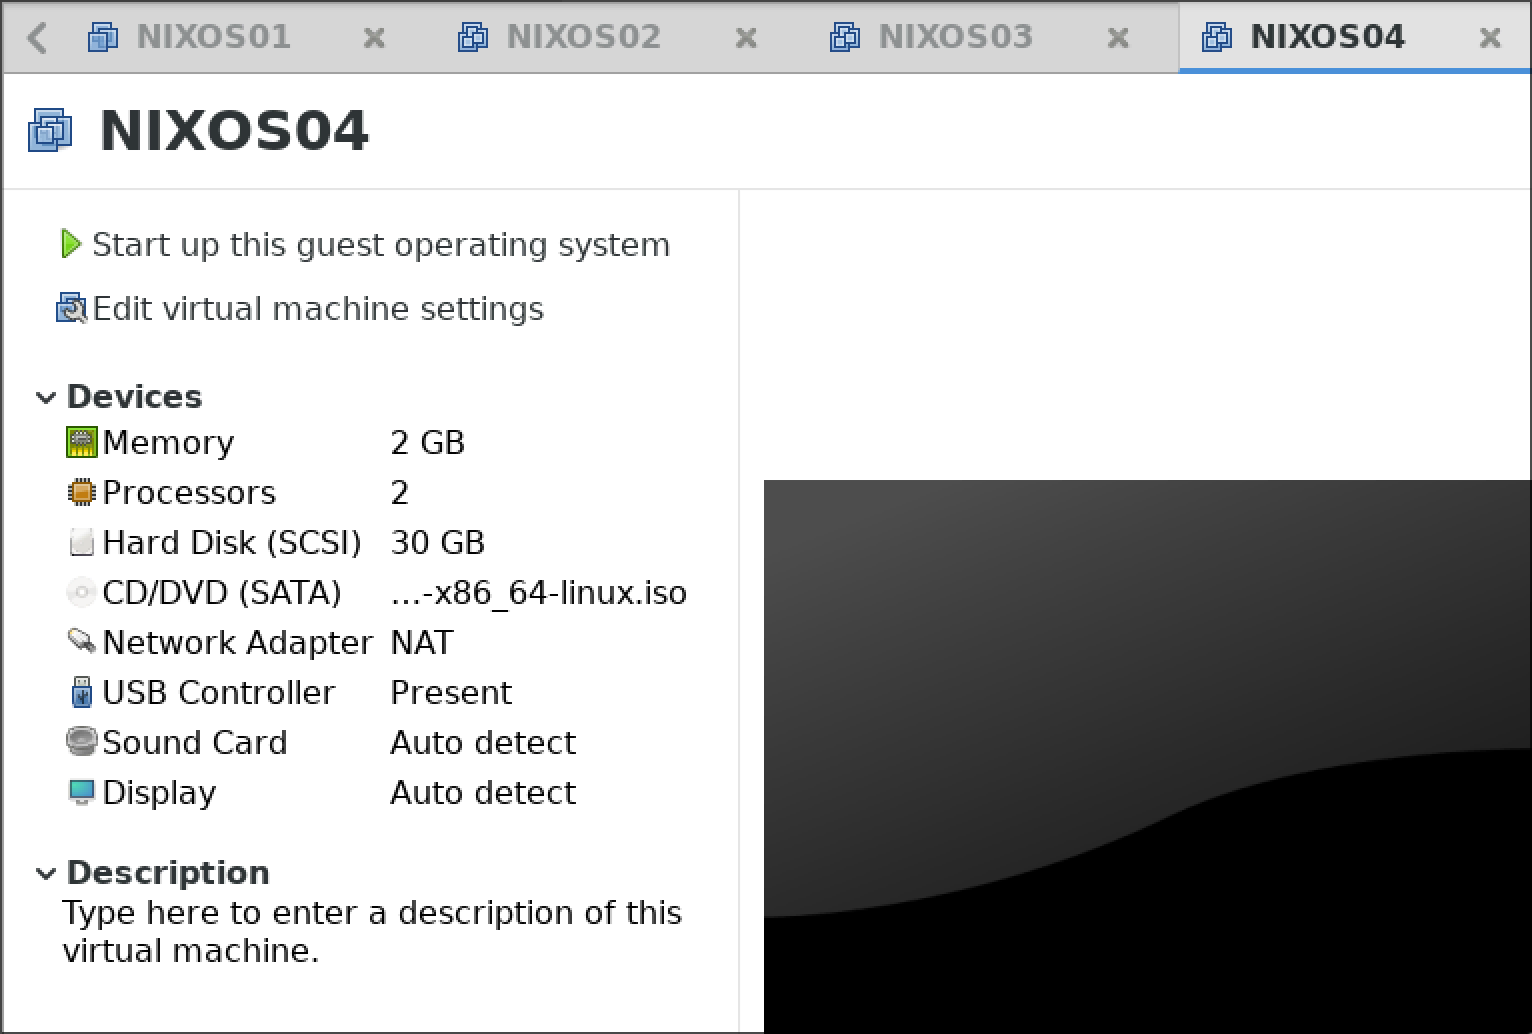
I won’t go into the details, but the result looks like this:
Note: To ease setup, clone this host so that you end up with four hosts in total.
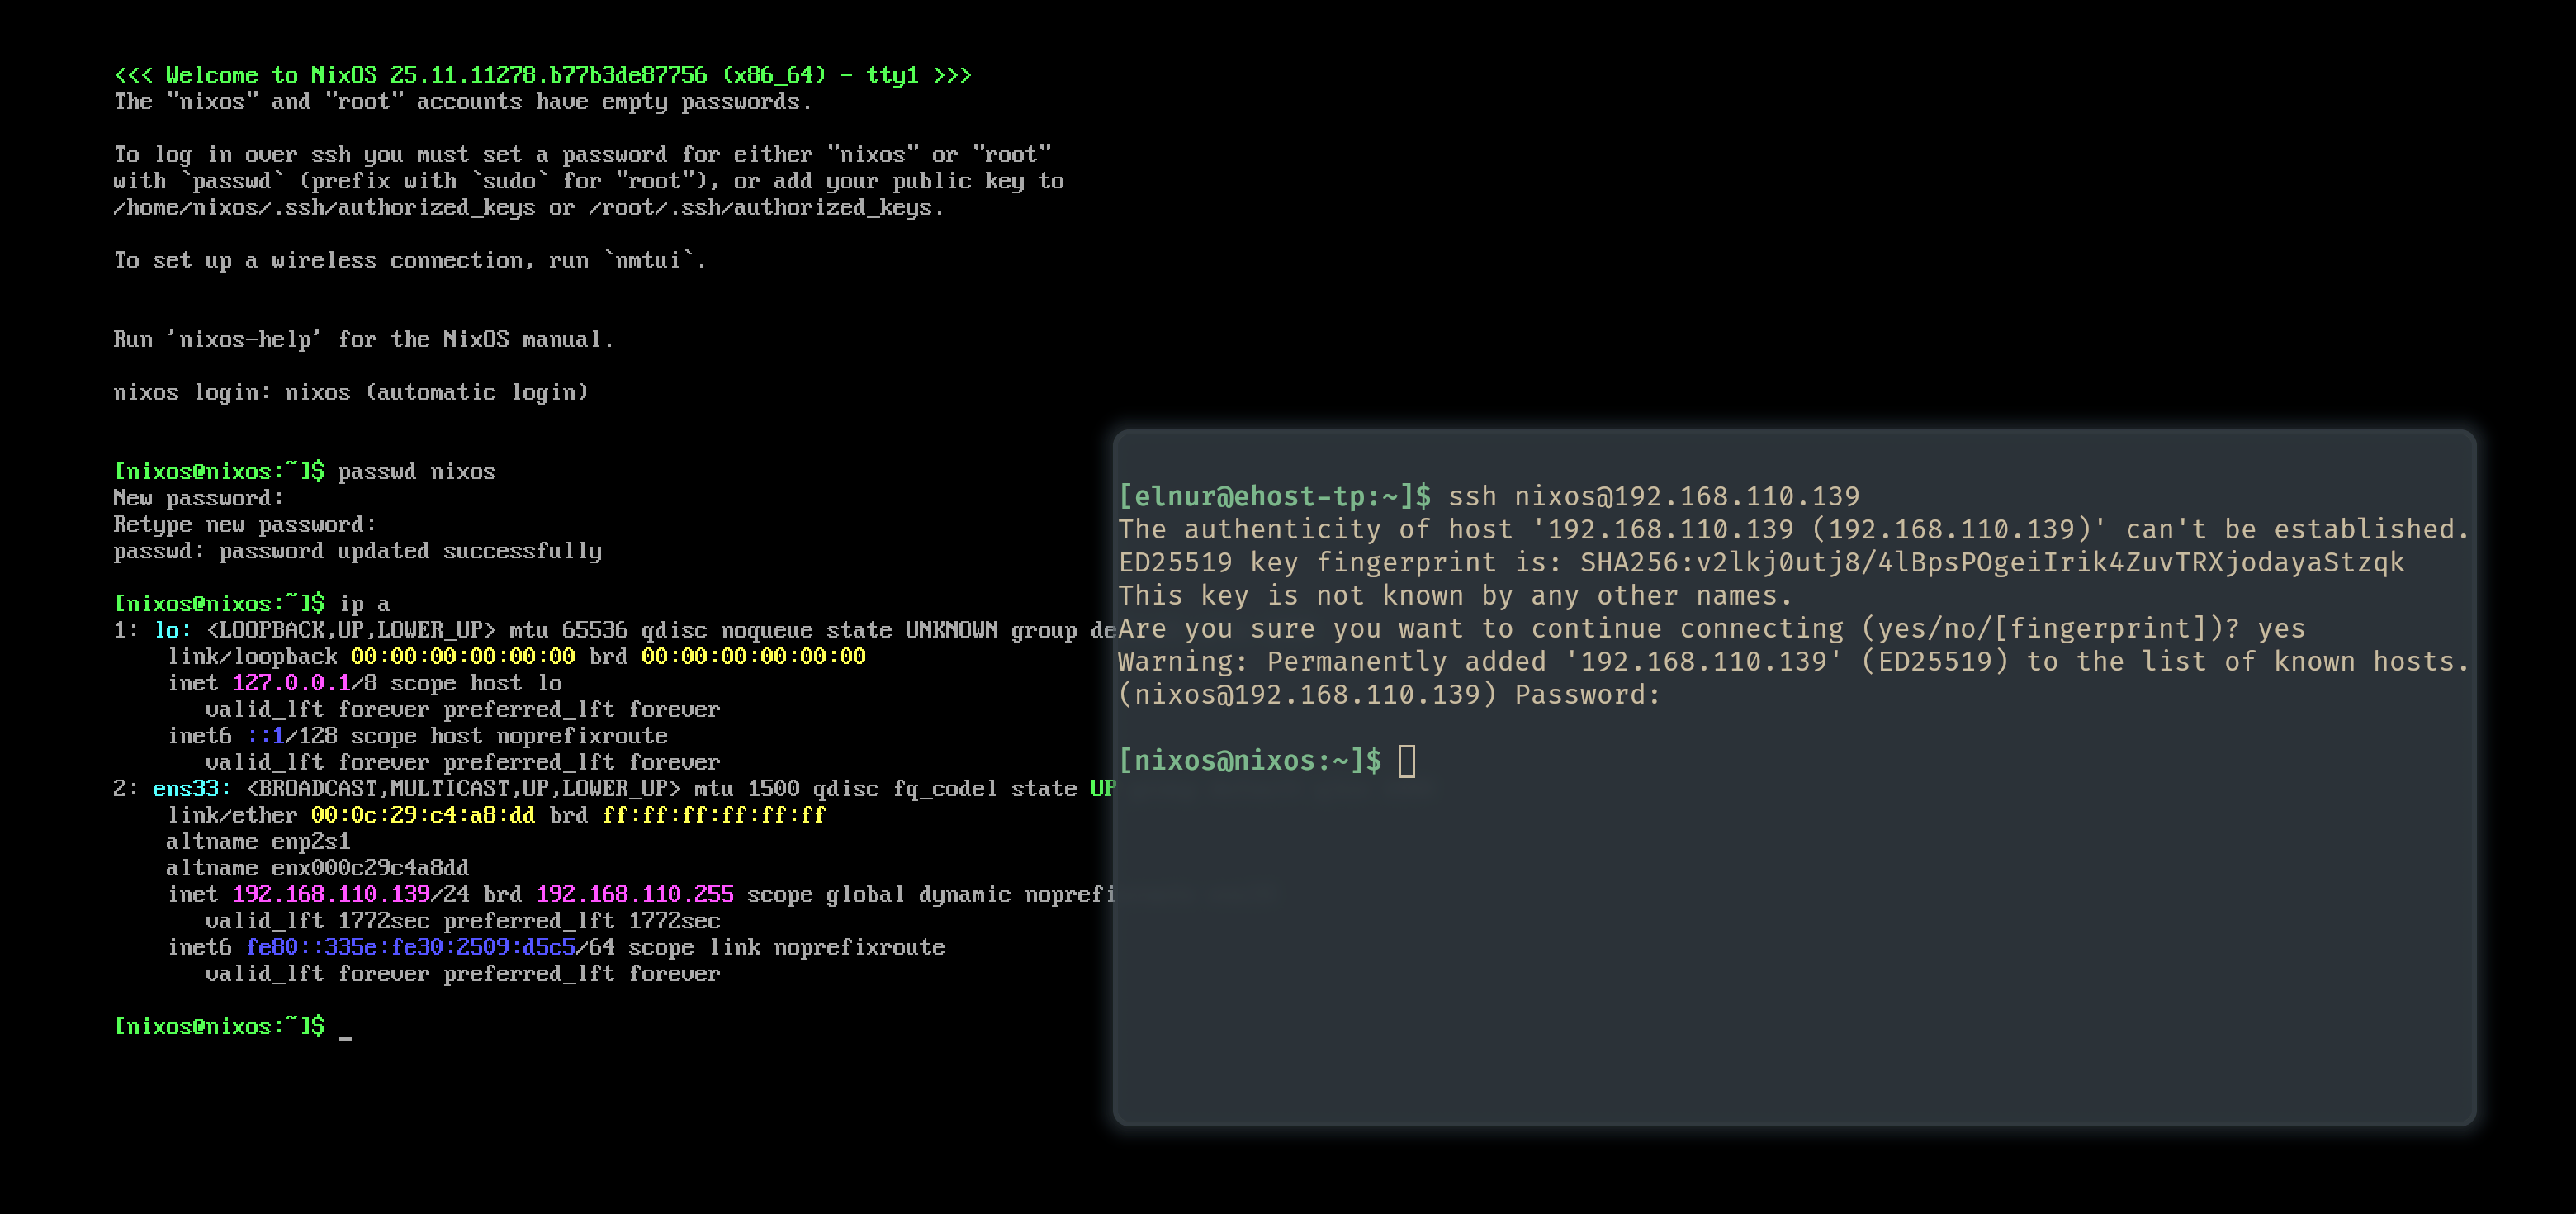
In the host’s console, the first thing to do is set a password with passwd nixos, and then SSH into the host.
Repeat everything up to this point for the remaining hosts.
Minimal Installation of the Control Plane
Partition, Format, and Mount
For the control-plane host, we first need to partition, format, and mount the filesystem:
# Become God
sudo su
# Get some info like the disks and BIOS or UEFI
lsblk
[ -d /sys/firmware/efi ] && echo UEFI || echo BIOS
# Partition, Format and Mount
parted /dev/sda -- mklabel msdos
parted /dev/sda -- mkpart primary 1MiB -2GiB
parted /dev/sda -- mkpart primary linux-swap -2GiB 100%
mkfs.ext4 -L nixos /dev/sda1
mkswap -L swap /dev/sda2
mount /dev/disk/by-label/nixos /mnt
swapon /dev/sda2
Generate the Configuration
Generate the config:
nixos-generate-config --root /mnt
cd /mnt/etc/nixos
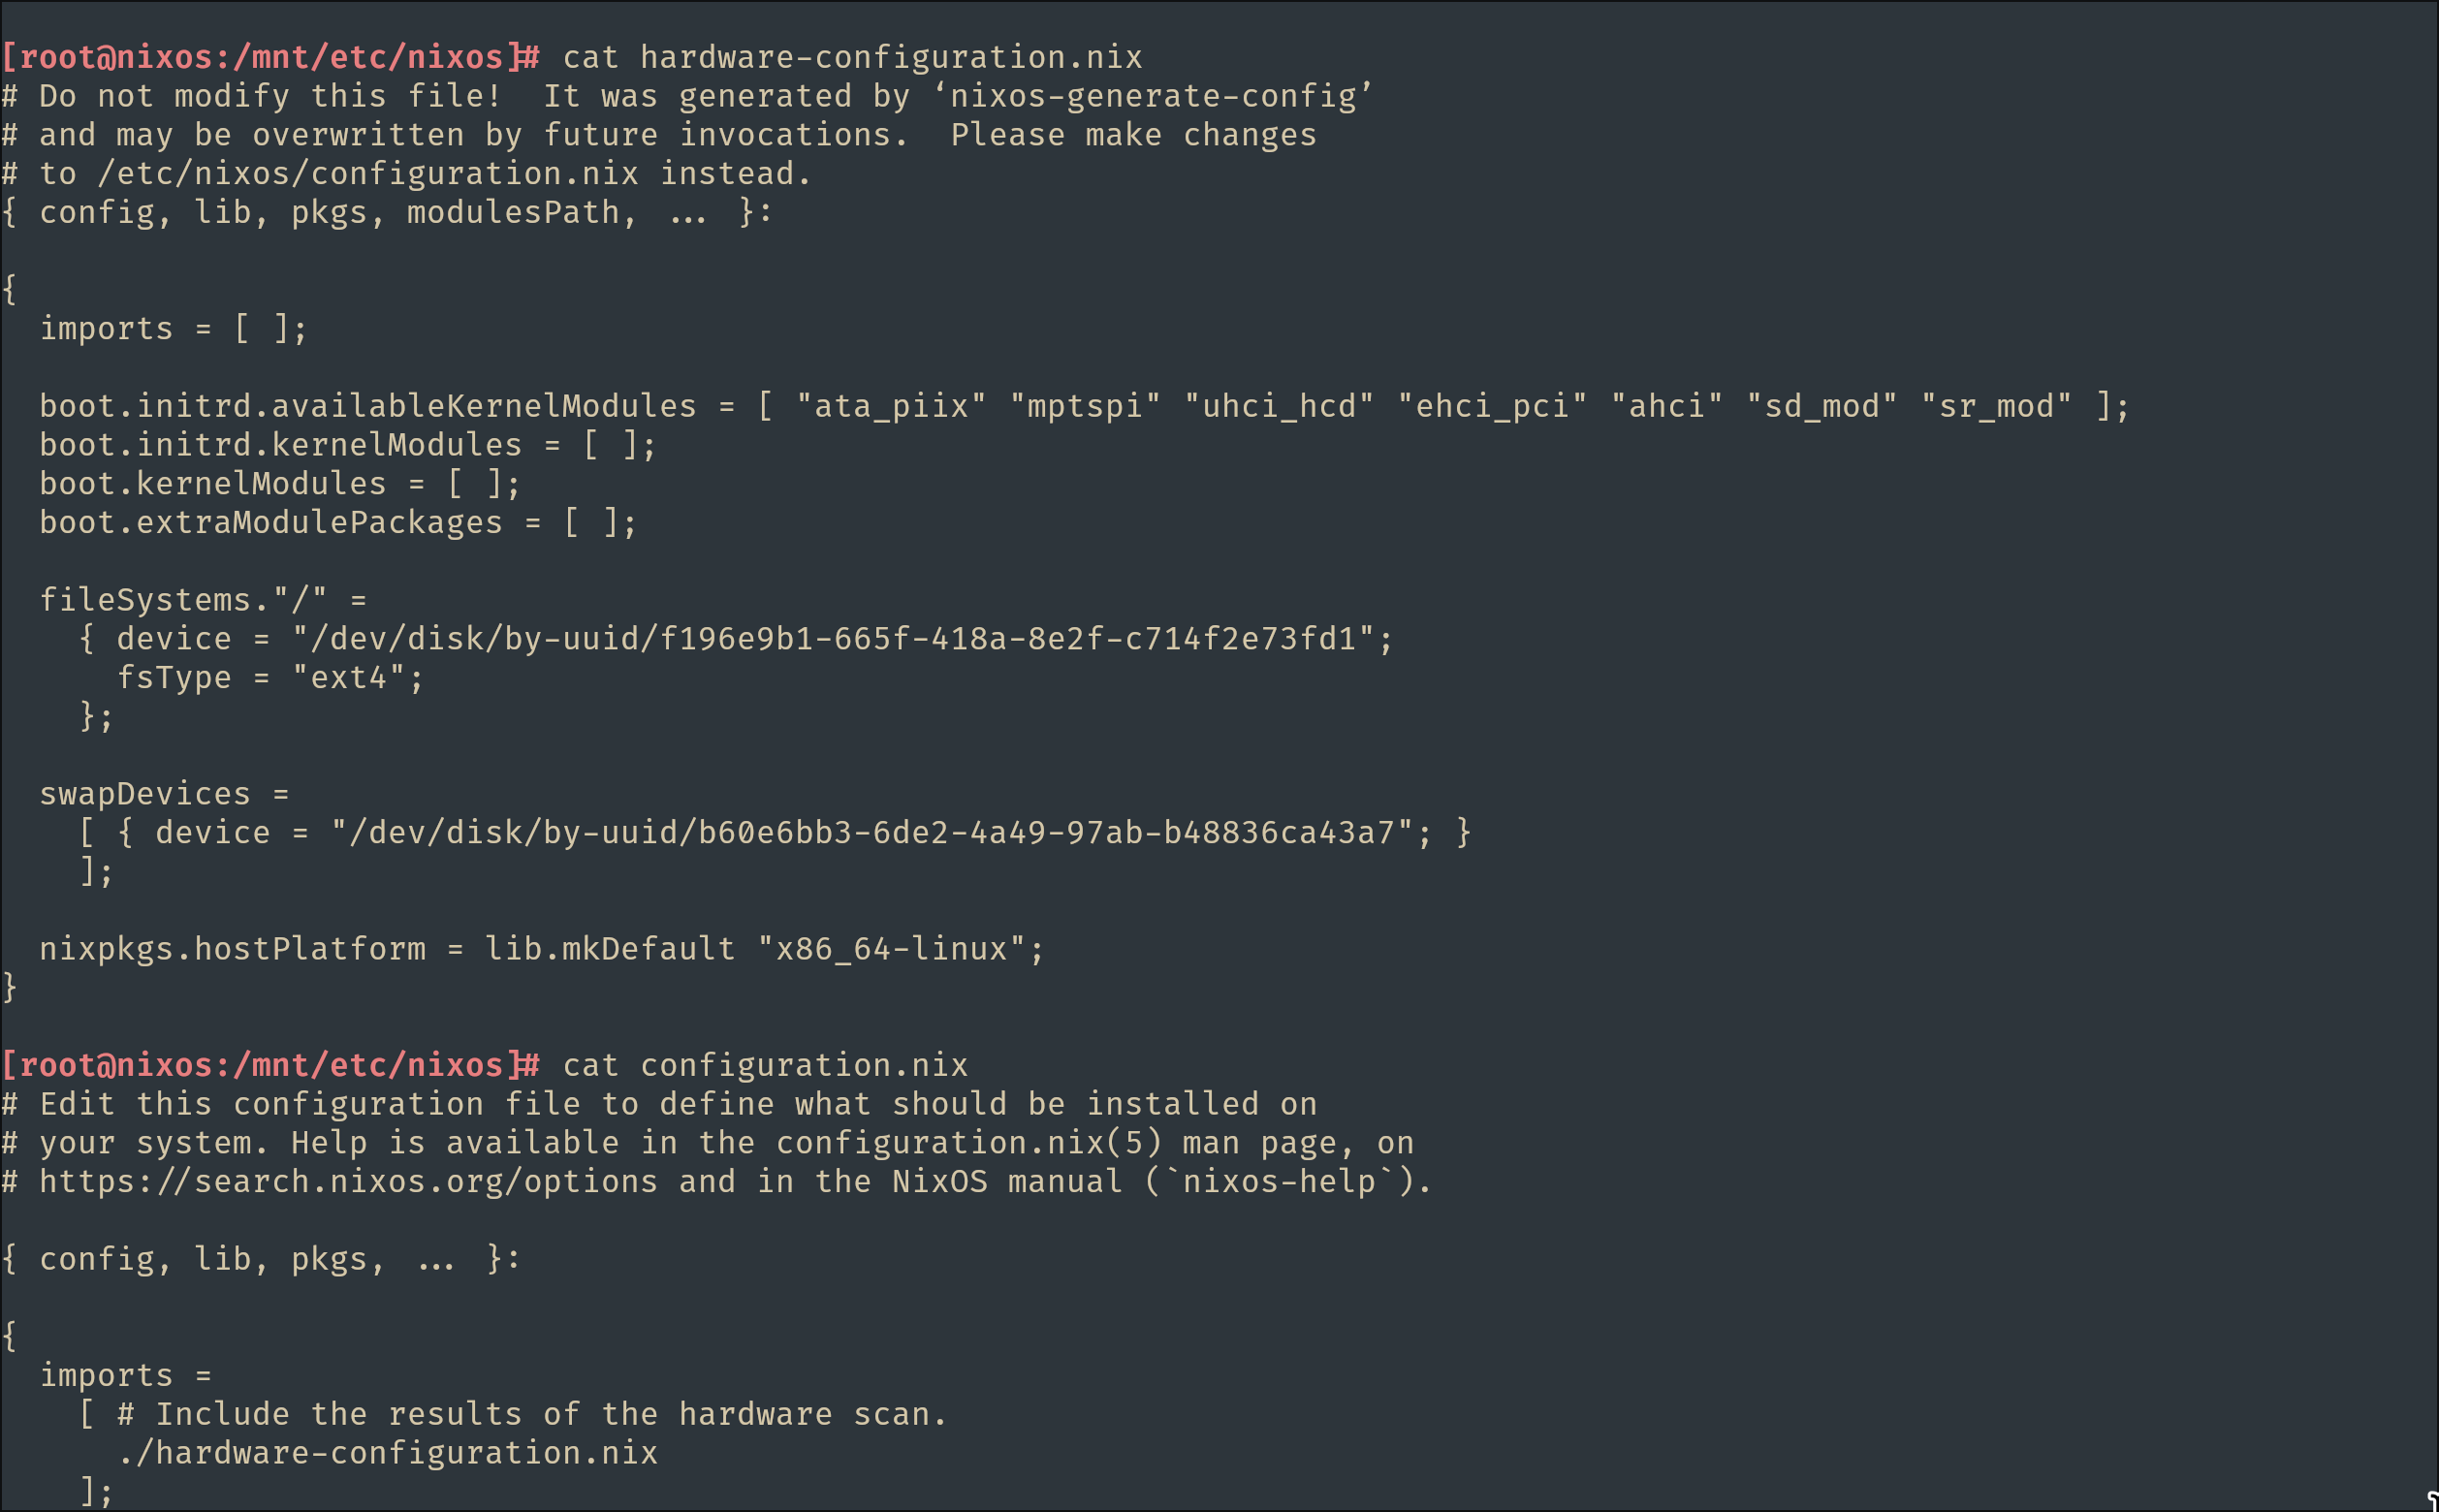
You now have a default configuration and a hardware configuration generated for this particular host.
Flake and System Configuration
Prepare the flake.nix:
{
  description = "NixOS control plane";

  inputs.nixpkgs.url = "github:NixOS/nixpkgs/nixos-26.05";

  outputs = { self, nixpkgs }: {
    nixosConfigurations.cp01 = nixpkgs.lib.nixosSystem {
      system = "x86_64-linux";
      modules = [ ./configuration.nix ];
    };
  };
}
And the minimal control-plane configuration.nix:
{ config, pkgs, ... }:
{
  imports = [ ./hardware-configuration.nix ];

  boot.loader.grub.enable = true;
  boot.loader.grub.device = "/dev/sda";

  networking.hostName = "cp01";

  nix.settings.experimental-features = [ "nix-command" "flakes" ];
  nix.settings.trusted-users = [ "root" "@wheel" ];

  services.openssh.enable = true;

  users.users.elnur = {
    isNormalUser = true;
    extraGroups = [ "wheel" ];
    initialPassword = "changeme";
  };
  security.sudo.wheelNeedsPassword = false;

  environment.systemPackages = with pkgs; [ git vim ];

  system.stateVersion = "26.05";
}
Install and Reboot
Now nixos-install it:
nixos-install --flake /mnt/etc/nixos#cp01 --no-root-passwd
reboot
Prepare the Deployment Environment
After the host has booted, prepare the environment:
ssh [email protected]
passwd # change password
ssh-keygen -t ed25519 -N "" -f ~/.ssh/id_ed25519   # key you'll authorize on all targets
mkdir ~/fleet && cd ~/fleet && git init # it is where the infra config gonna reside
sudo cp /etc/nixos/{flake.nix,configuration.nix,hardware-configuration.nix} . && sudo chown elnur: * # all the .nix files should be moved here
git add -A && git commit -m "cp01 baseline"
The output of these commands will be:
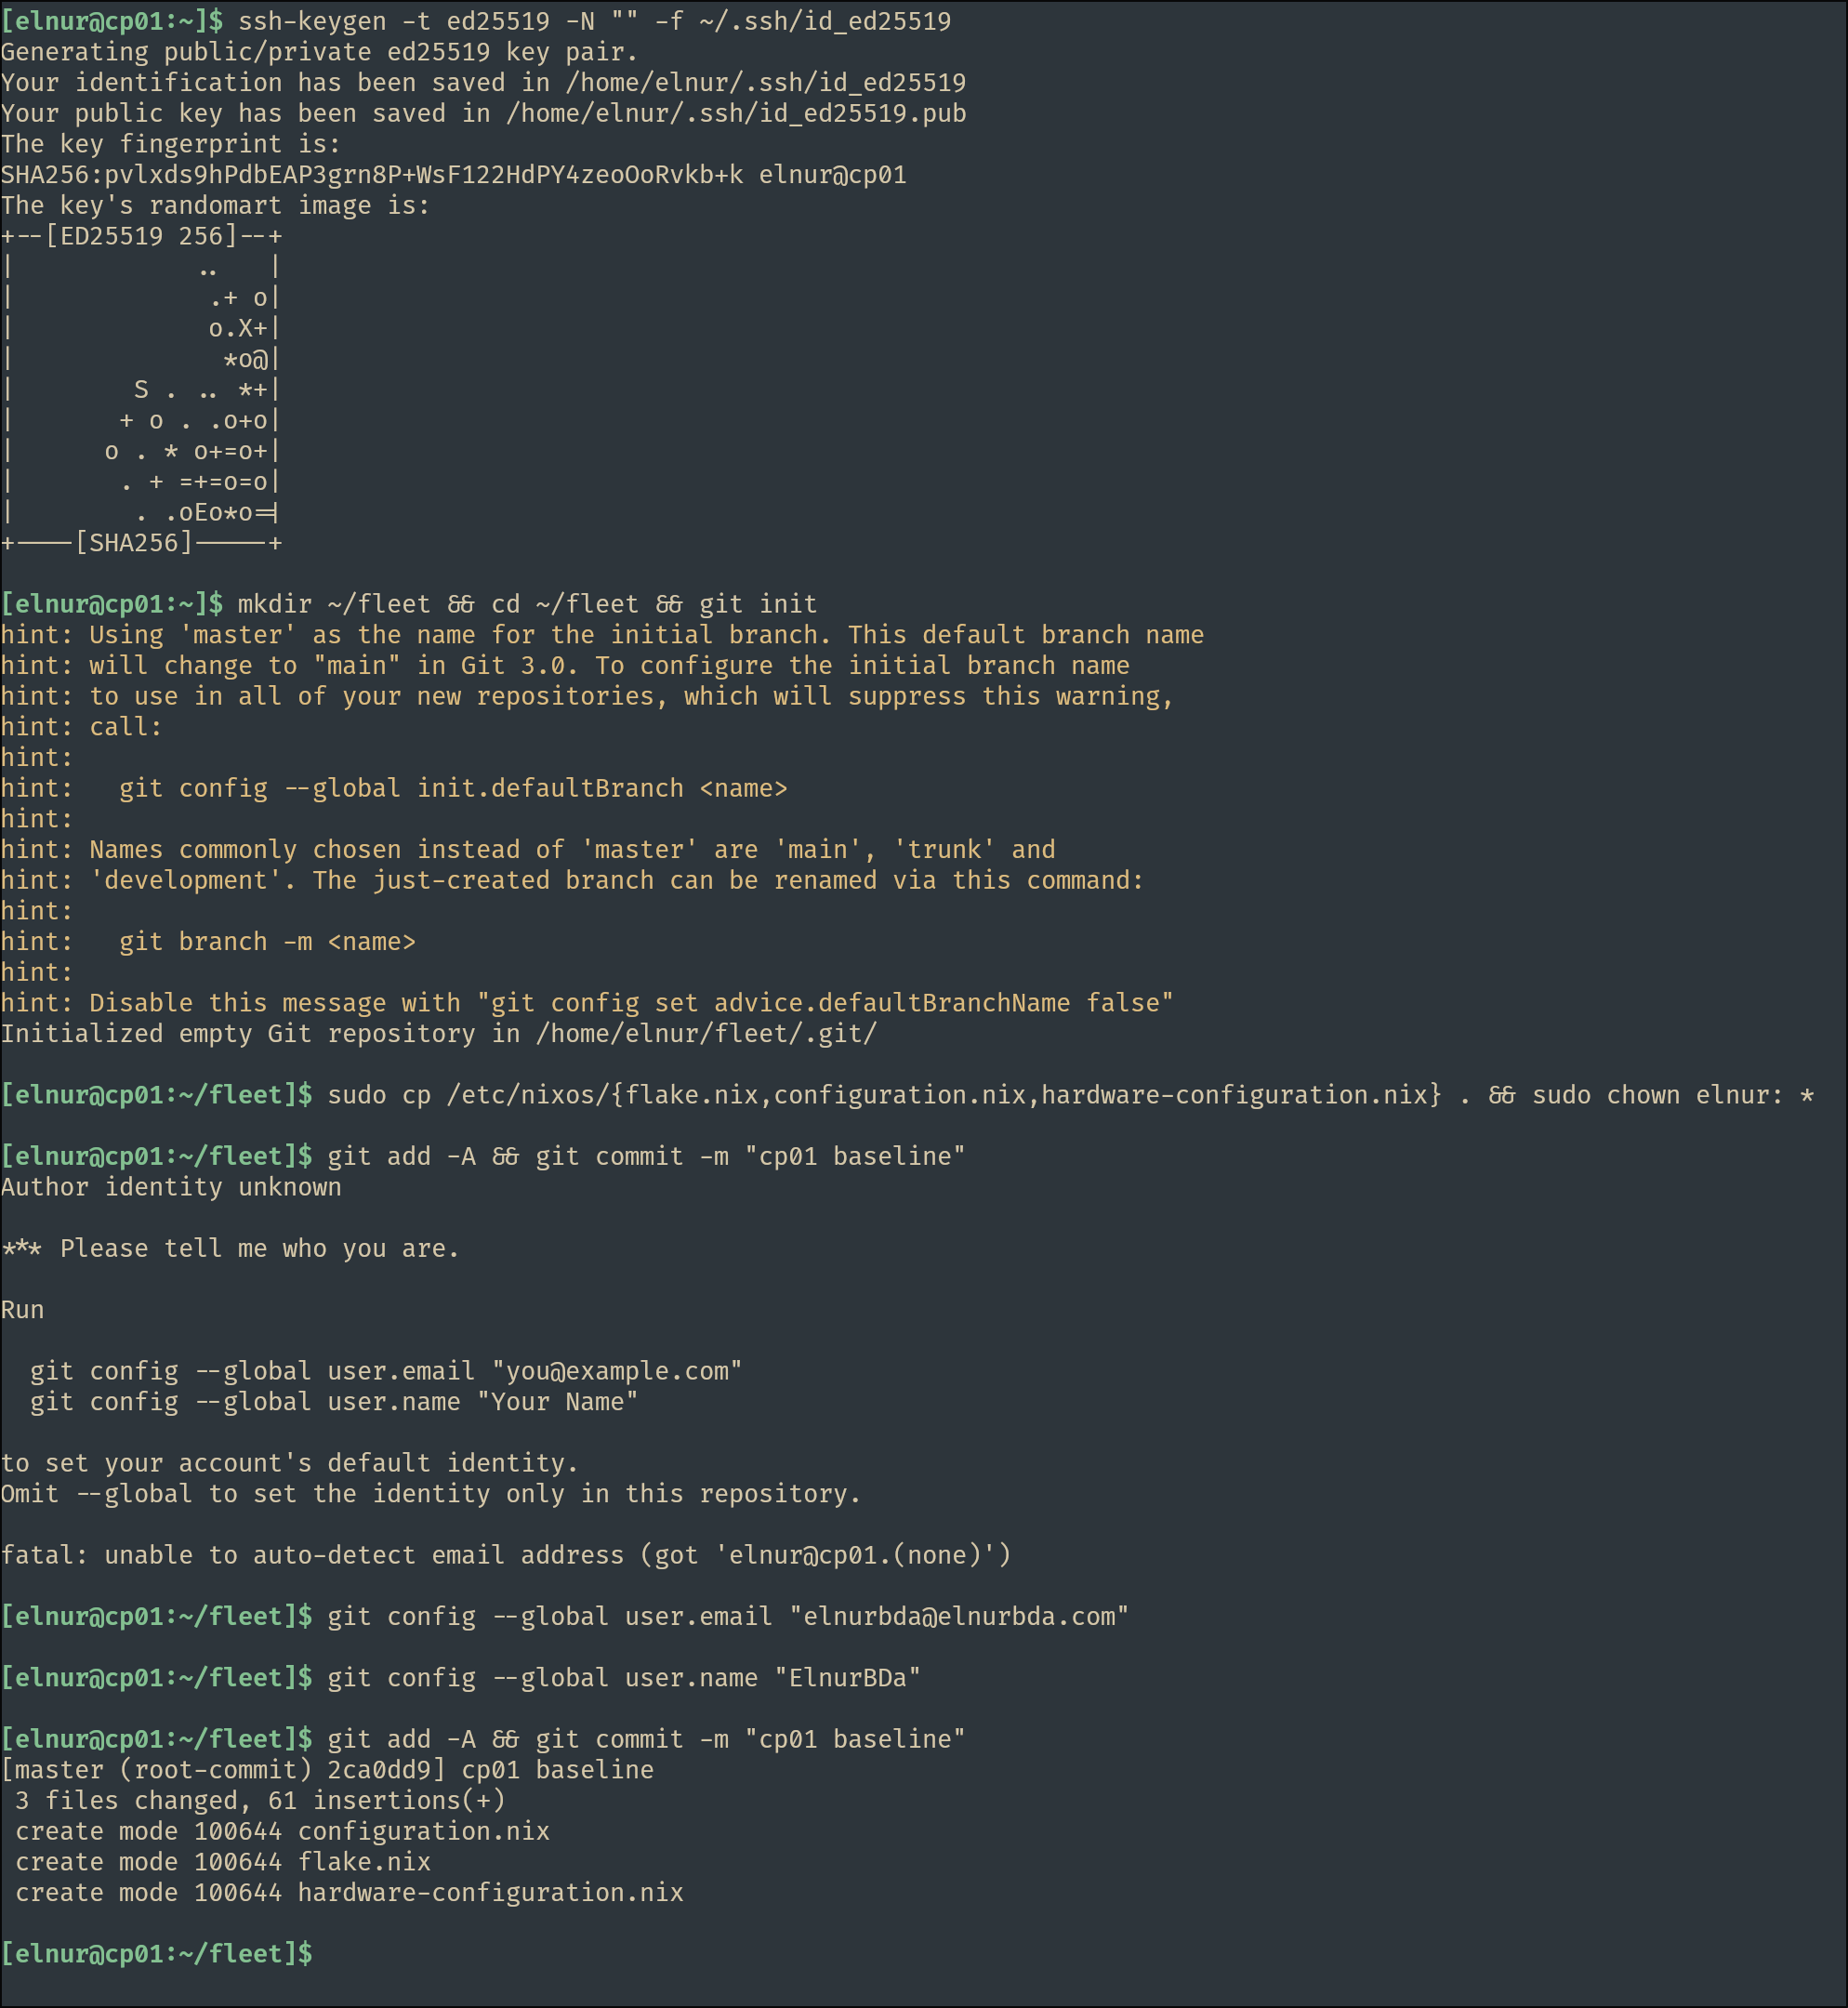
As a result, the directory contains:
configuration.nixflake.nixhardware-configuration.nix
From here, the push mechanism to the other three VMs will be:
nixos-rebuild switch --flake .#<target> --build-host localhost --target-host root@<ip>But not yet - first we will write the OpenBao configuration for a single host, and only afterwards upgrade it to HA.
OpenBao Setup
Configuration
Restructure into hosts/ and modules/
First, we reorganize the flat repository into a layout that scales to multiple hosts:
cd ~/fleet
mkdir -p hosts/{cp01,bao01} modules
git mv configuration.nix hosts/cp01/default.nix
git mv hardware-configuration.nix hosts/cp01/
The shared baseline, extracted from the old config, goes into modules/base.nix:
{ pkgs, ... }:
{
  nix.settings.experimental-features = [ "nix-command" "flakes" ];
  nix.settings.trusted-users = [ "root" "@wheel" ];

  services.openssh.enable = true;

  users.users.root.openssh.authorizedKeys.keys = [ "CP01_PUBKEY" ];
  users.users.elnur = {
    isNormalUser = true;
    extraGroups = [ "wheel" ];
    initialPassword = "changeme";
    openssh.authorizedKeys.keys = [ "CP01_PUBKEY" ];
  };
  security.sudo.wheelNeedsPassword = false;

  # fleet-wide name resolution; adjust to your DHCP leases
  networking.hosts = {
    "192.168.110.139" = [ "cp01" ];
    "192.168.110.140" = [ "bao01" ];
  };

  environment.systemPackages = with pkgs; [ git vim ];

  system.stateVersion = "26.05";
}
# Replace placeholders
sed -i "s|CP01_PUBKEY|$(cat ~/.ssh/id_ed25519.pub)|" modules/base.nixcp01 keeps only what is host-specific in hosts/cp01/default.nix:
{ ... }:
{
  imports = [ ./hardware-configuration.nix ];

  boot.loader.grub.enable = true;
  boot.loader.grub.device = "/dev/sda";

  networking.hostName = "cp01";
}
The OpenBao host is equally minimal in hosts/bao01/default.nix:
{ ... }:
{
  networking.hostName = "bao01";
  boot.loader.grub.enable = true;   # disko supplies grub.devices via the EF02 partition
}
The hardware configuration for bao01 is taken from the remote host itself, by generating it there without any filesystem entries:
ssh [email protected] "sudo nixos-generate-config --no-filesystems --show-hardware-config" > hosts/bao01/hardware-configuration.nix--no-filesystems omits the fileSystems.* and swapDevices entries, since disko will own those, and --show-hardware-config prints to stdout so the result lands straight in the repo.
Declarative Disk Layout
The disk layout that replaces the manual parted/mkfs steps (see Declarative Disks with disko) goes into modules/disko-vm.nix:
{
  disko.devices.disk.main = {
    type = "disk";
    device = "/dev/sda";
    content = {
      type = "gpt";
      partitions = {
        boot = {
          size = "1M";
          type = "EF02";   # BIOS boot partition for GRUB-on-GPT
        };
        swap = {
          size = "2G";
          content.type = "swap";
        };
        root = {
          size = "100%";
          content = {
            type = "filesystem";
            format = "ext4";
            mountpoint = "/";
          };
        };
      };
    };
  };
}
The OpenBao Module
The OpenBao service itself lives in modules/openbao.nix. It runs as a single node with raft storage from day one, so the later HA stage is only a matter of “add peers”. The nixpkgs module runs OpenBao as a hardened DynamicUser unit with state in /var/lib/openbao, and it deliberately does not restart the unit on nixos-rebuild switch, so future pushes will not seal it:
{ config, ... }:
{
  services.openbao = {
    enable = true;
    settings = {
      ui = true;

      listener.default = {
        type = "tcp";
        address = "0.0.0.0:8200";
        tls_disable = true;   # lab only;
      };

      api_addr = "http://${config.networking.hostName}:8200";
      cluster_addr = "http://${config.networking.hostName}:8201";

      storage.raft = {
        path = "/var/lib/openbao";
        node_id = config.networking.hostName;
      };
    };
  };

  networking.firewall.allowedTCPPorts = [ 8200 8201 ];
}
The Fleet Flake
The new flake.nix now has disko as an input. Note that bao01’s hardware config and disko modules are wired up here, since its default.nix stays import-free:
{
  description = "NixOS fleet";

  inputs = {
    nixpkgs.url = "github:NixOS/nixpkgs/nixos-26.05";
    disko = {
      url = "github:nix-community/disko";
      inputs.nixpkgs.follows = "nixpkgs";
    };
  };

  outputs = { self, nixpkgs, disko }: {
    nixosConfigurations = {
      cp01 = nixpkgs.lib.nixosSystem {
        system = "x86_64-linux";
        modules = [ ./modules/base.nix ./hosts/cp01 ];
      };

      bao01 = nixpkgs.lib.nixosSystem {
        system = "x86_64-linux";
        modules = [
          disko.nixosModules.disko
          ./modules/base.nix
          ./hosts/bao01
          ./hosts/bao01/hardware-configuration.nix
          ./modules/disko-vm.nix
          ./modules/openbao.nix
        ];
      };
    };
  };
}
Deployment
Rebuild the Control Plane
Prove the refactor is sound by rebuilding cp01 against the new layout (git add first: untracked files are invisible to flake eval):
git add -A
sudo nixos-rebuild switch --flake .#cp01
git add flake.lock && git commit -m "restructure into hosts/modules, disko, openbao"
Install bao01 with nixos-anywhere
Now convert bao01, which is still sitting in the live ISO. This is exactly the job for nixos-anywhere (see Remote Installation with nixos-anywhere):
ssh-copy-id [email protected]   # avoid password prompts mid-run
nix run github:nix-community/nixos-anywhere -- --flake .#bao01 --target-host [email protected] --build-on local
After the reboot, the host key has changed, so clean up and verify:
ssh-keygen -R 192.168.110.140 && ssh-keygen -R bao01
ssh root@bao01 systemctl status openbao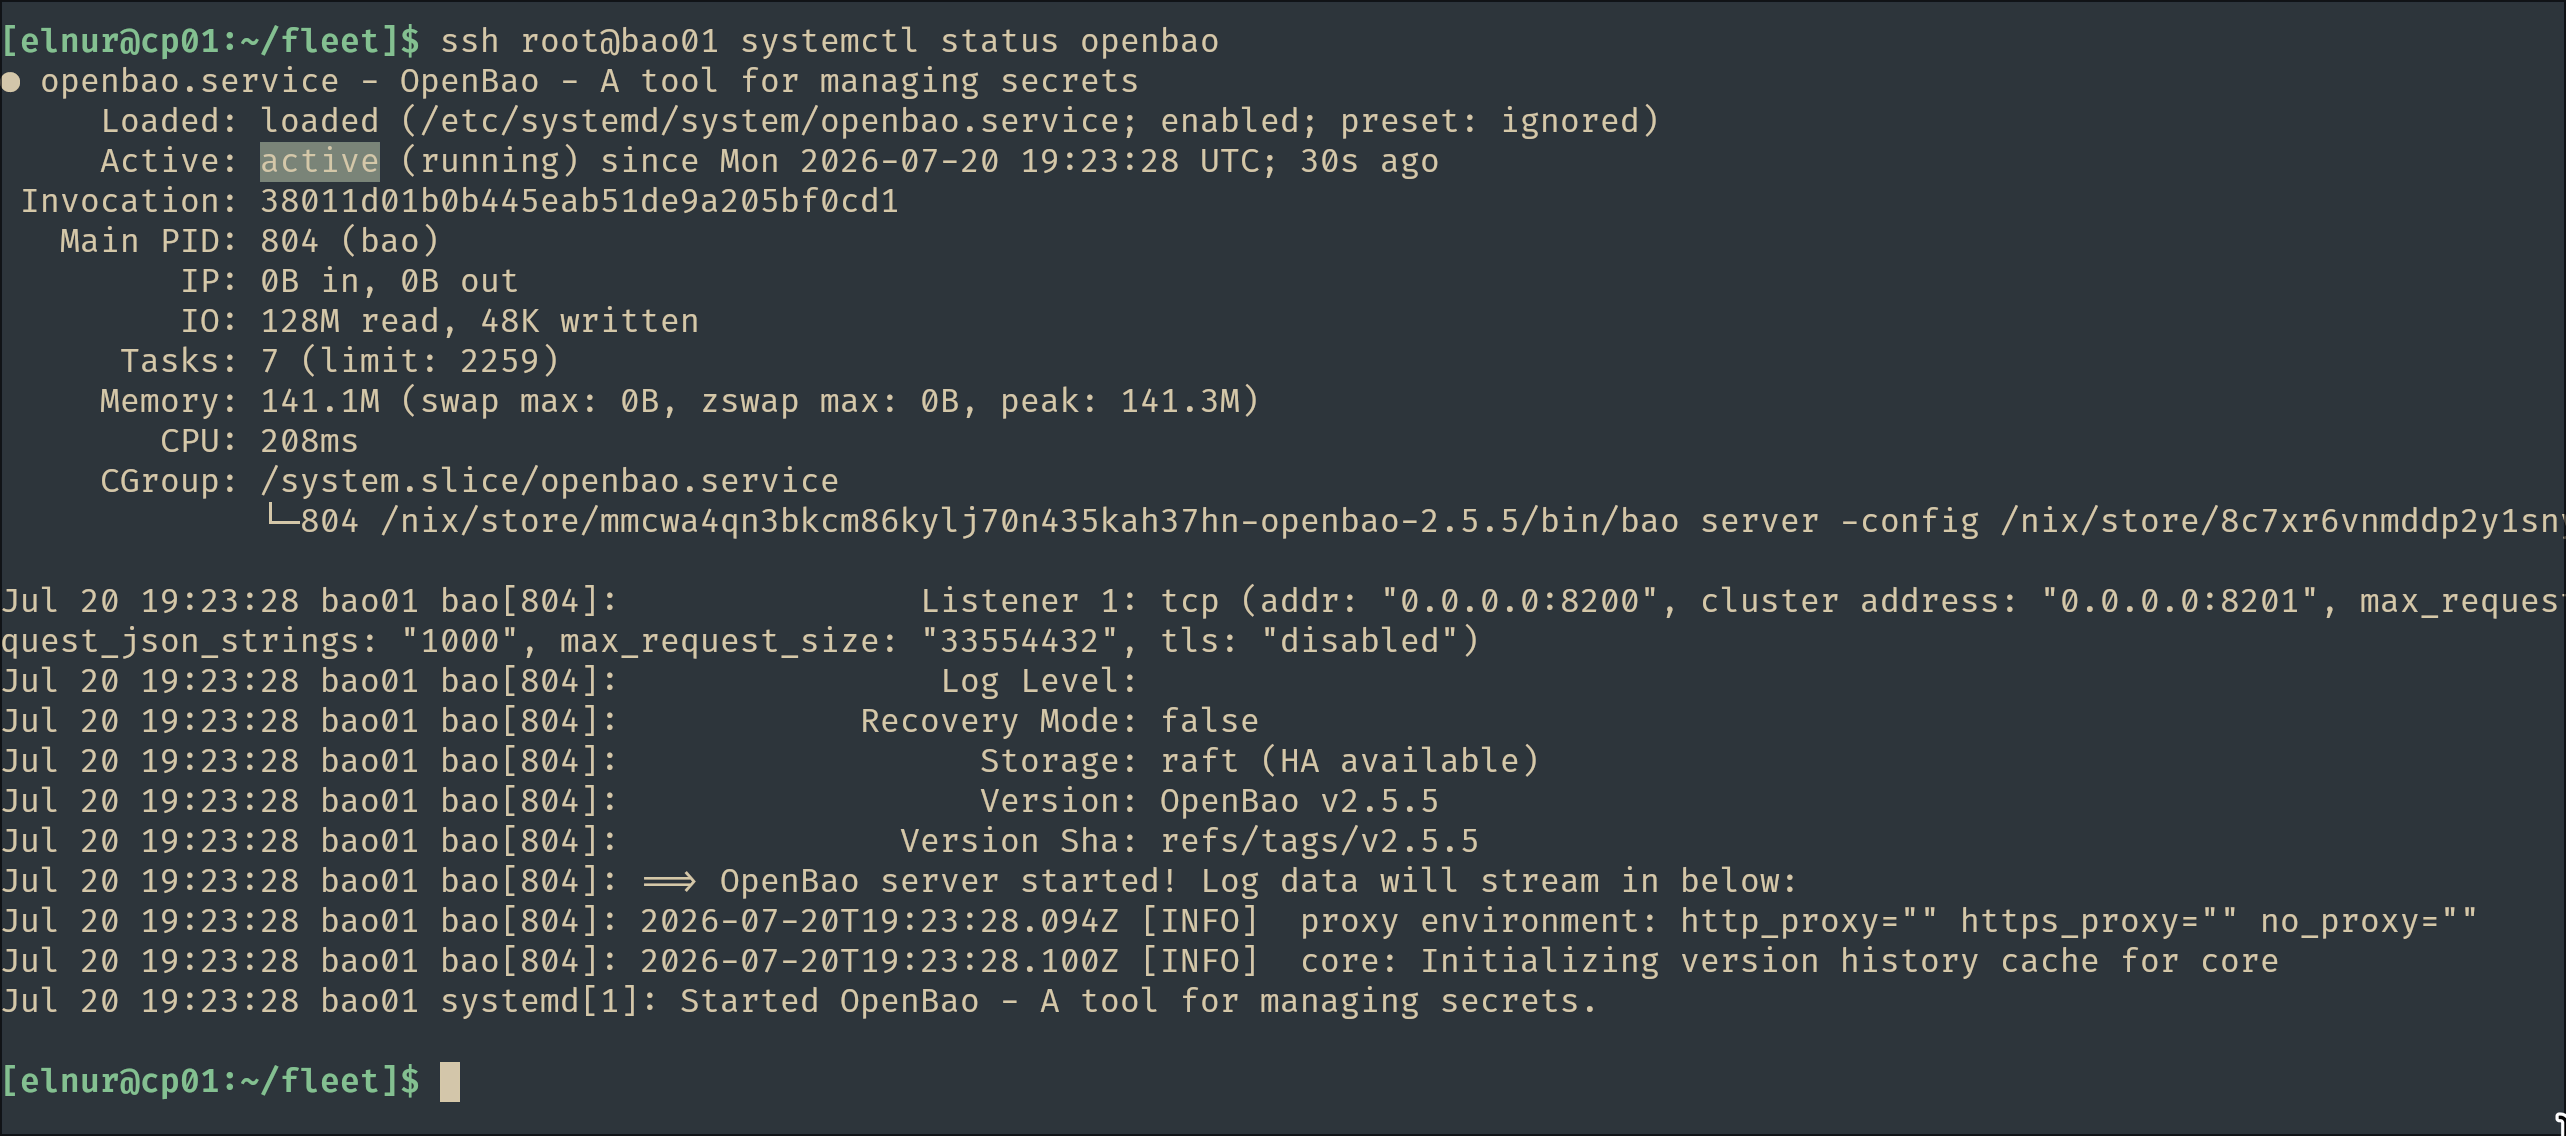
Initialize and Unseal
Initialize and unseal the single instance from cp01:
nix shell nixpkgs#openbao
export BAO_ADDR=http://bao01:8200
bao operator init            # save the 5 unseal keys + root token
bao operator unseal          # run 3 times with 3 different keys
bao status
bao login                    # root token
Save the keys and the token!
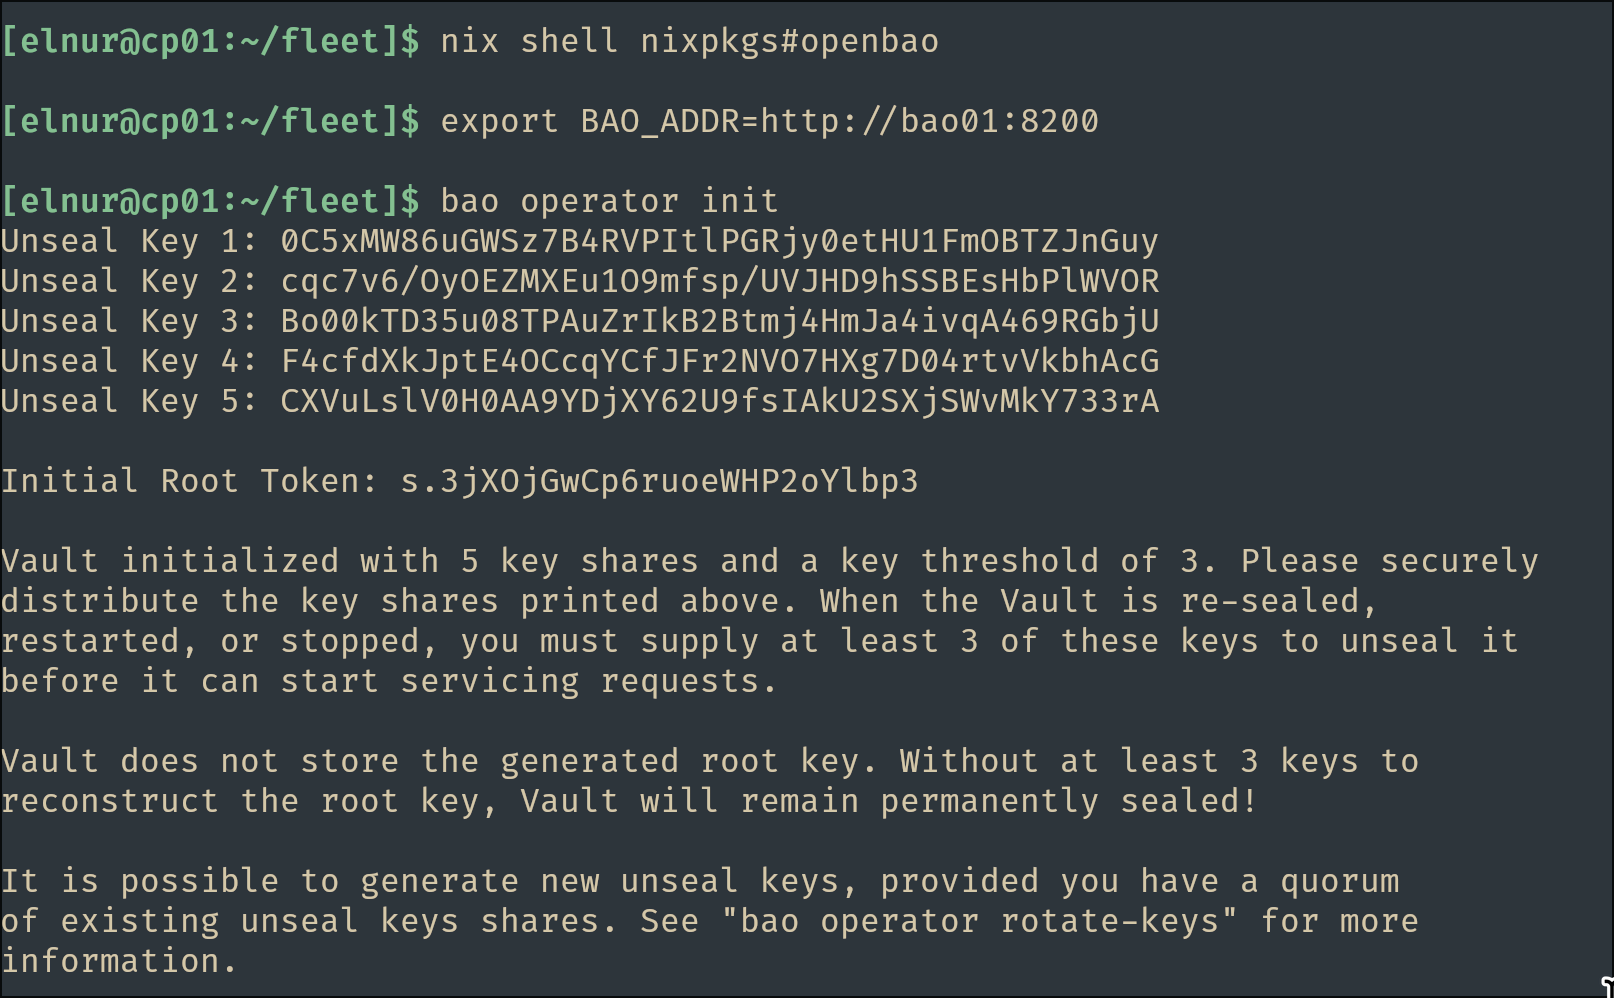
Try the root login; it should work:
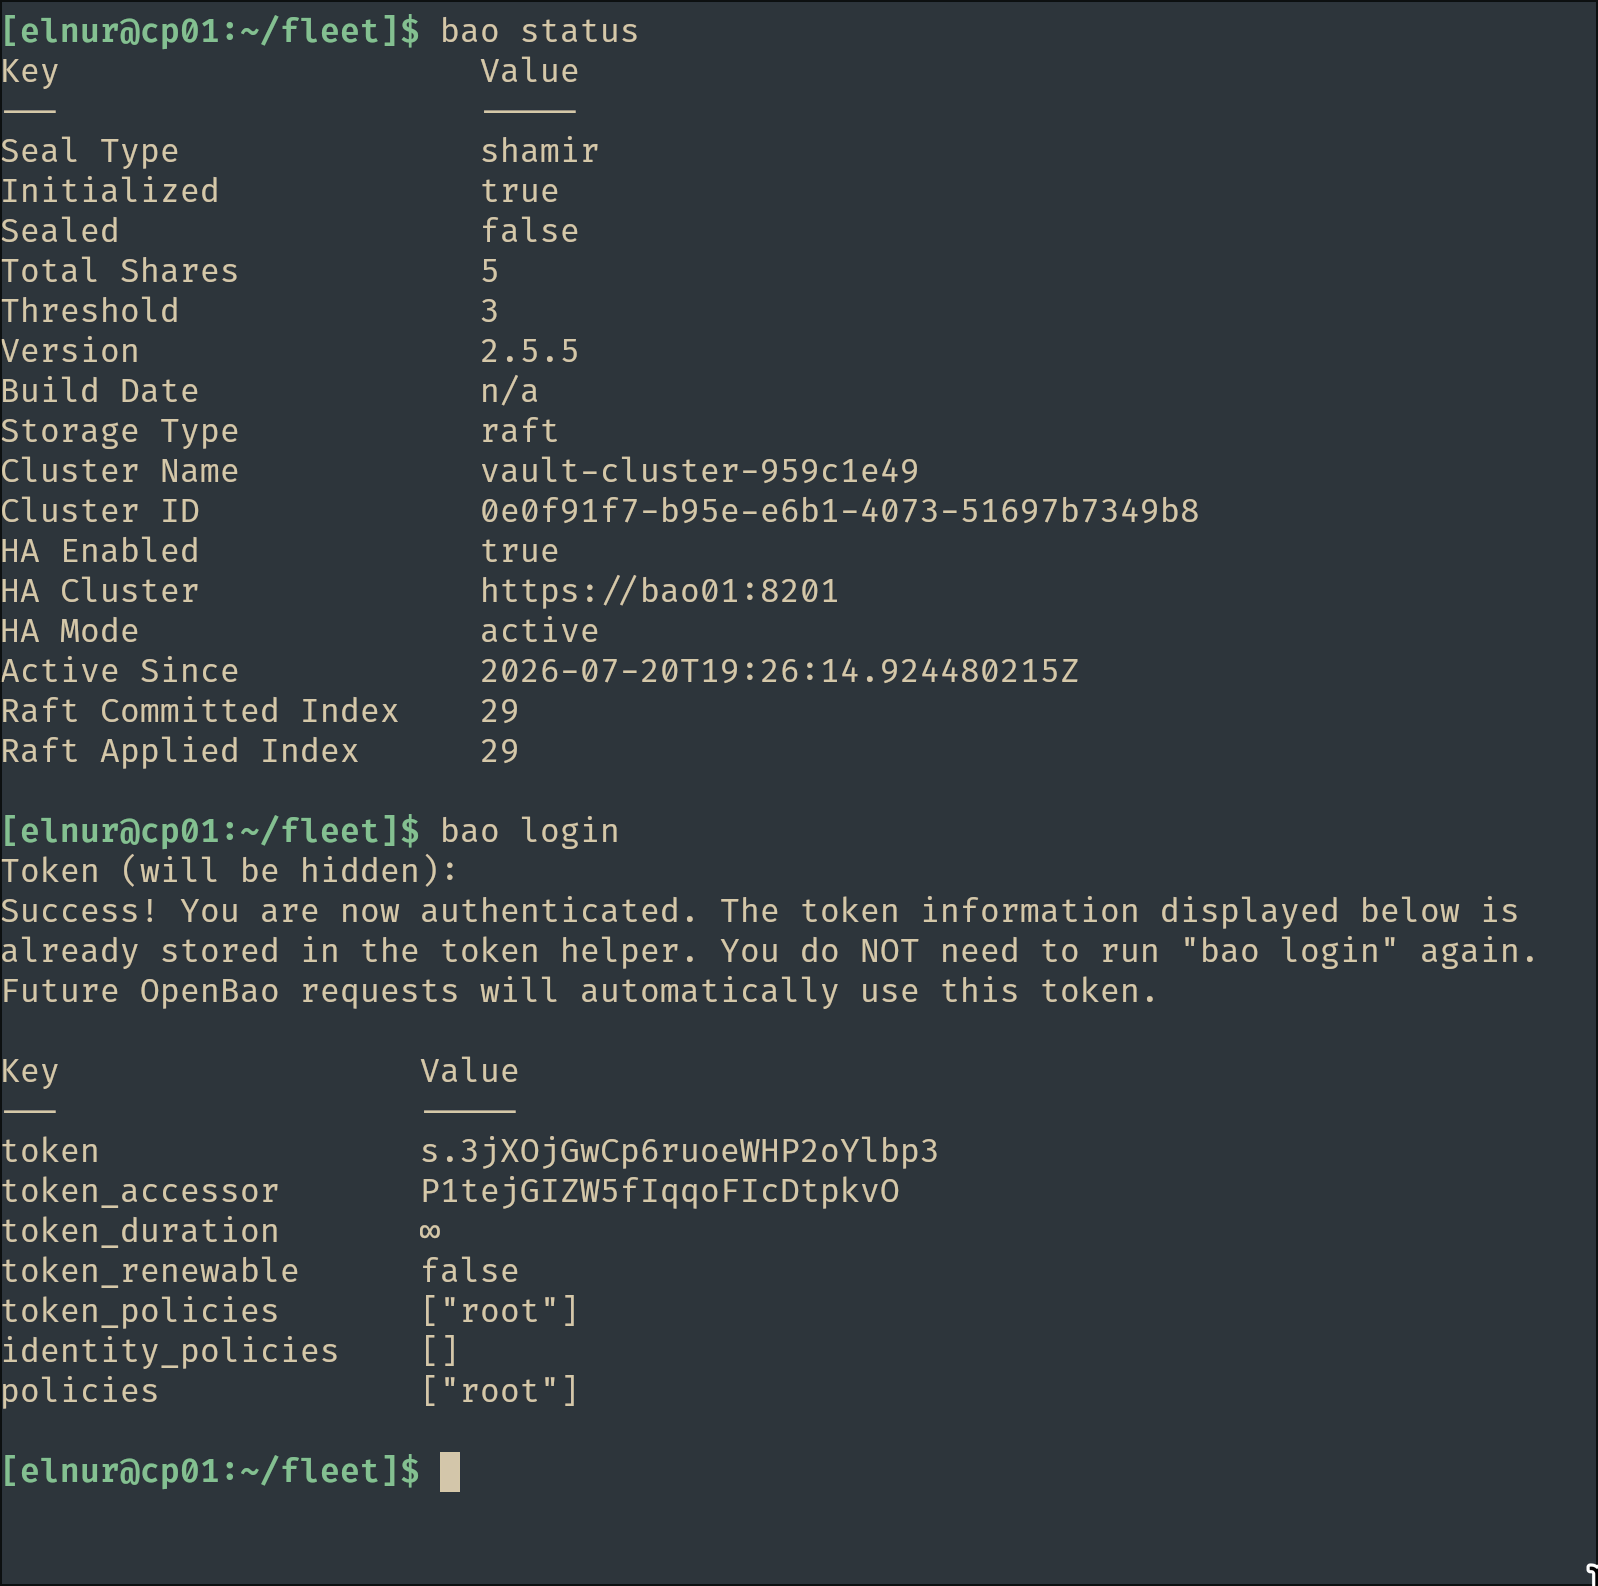
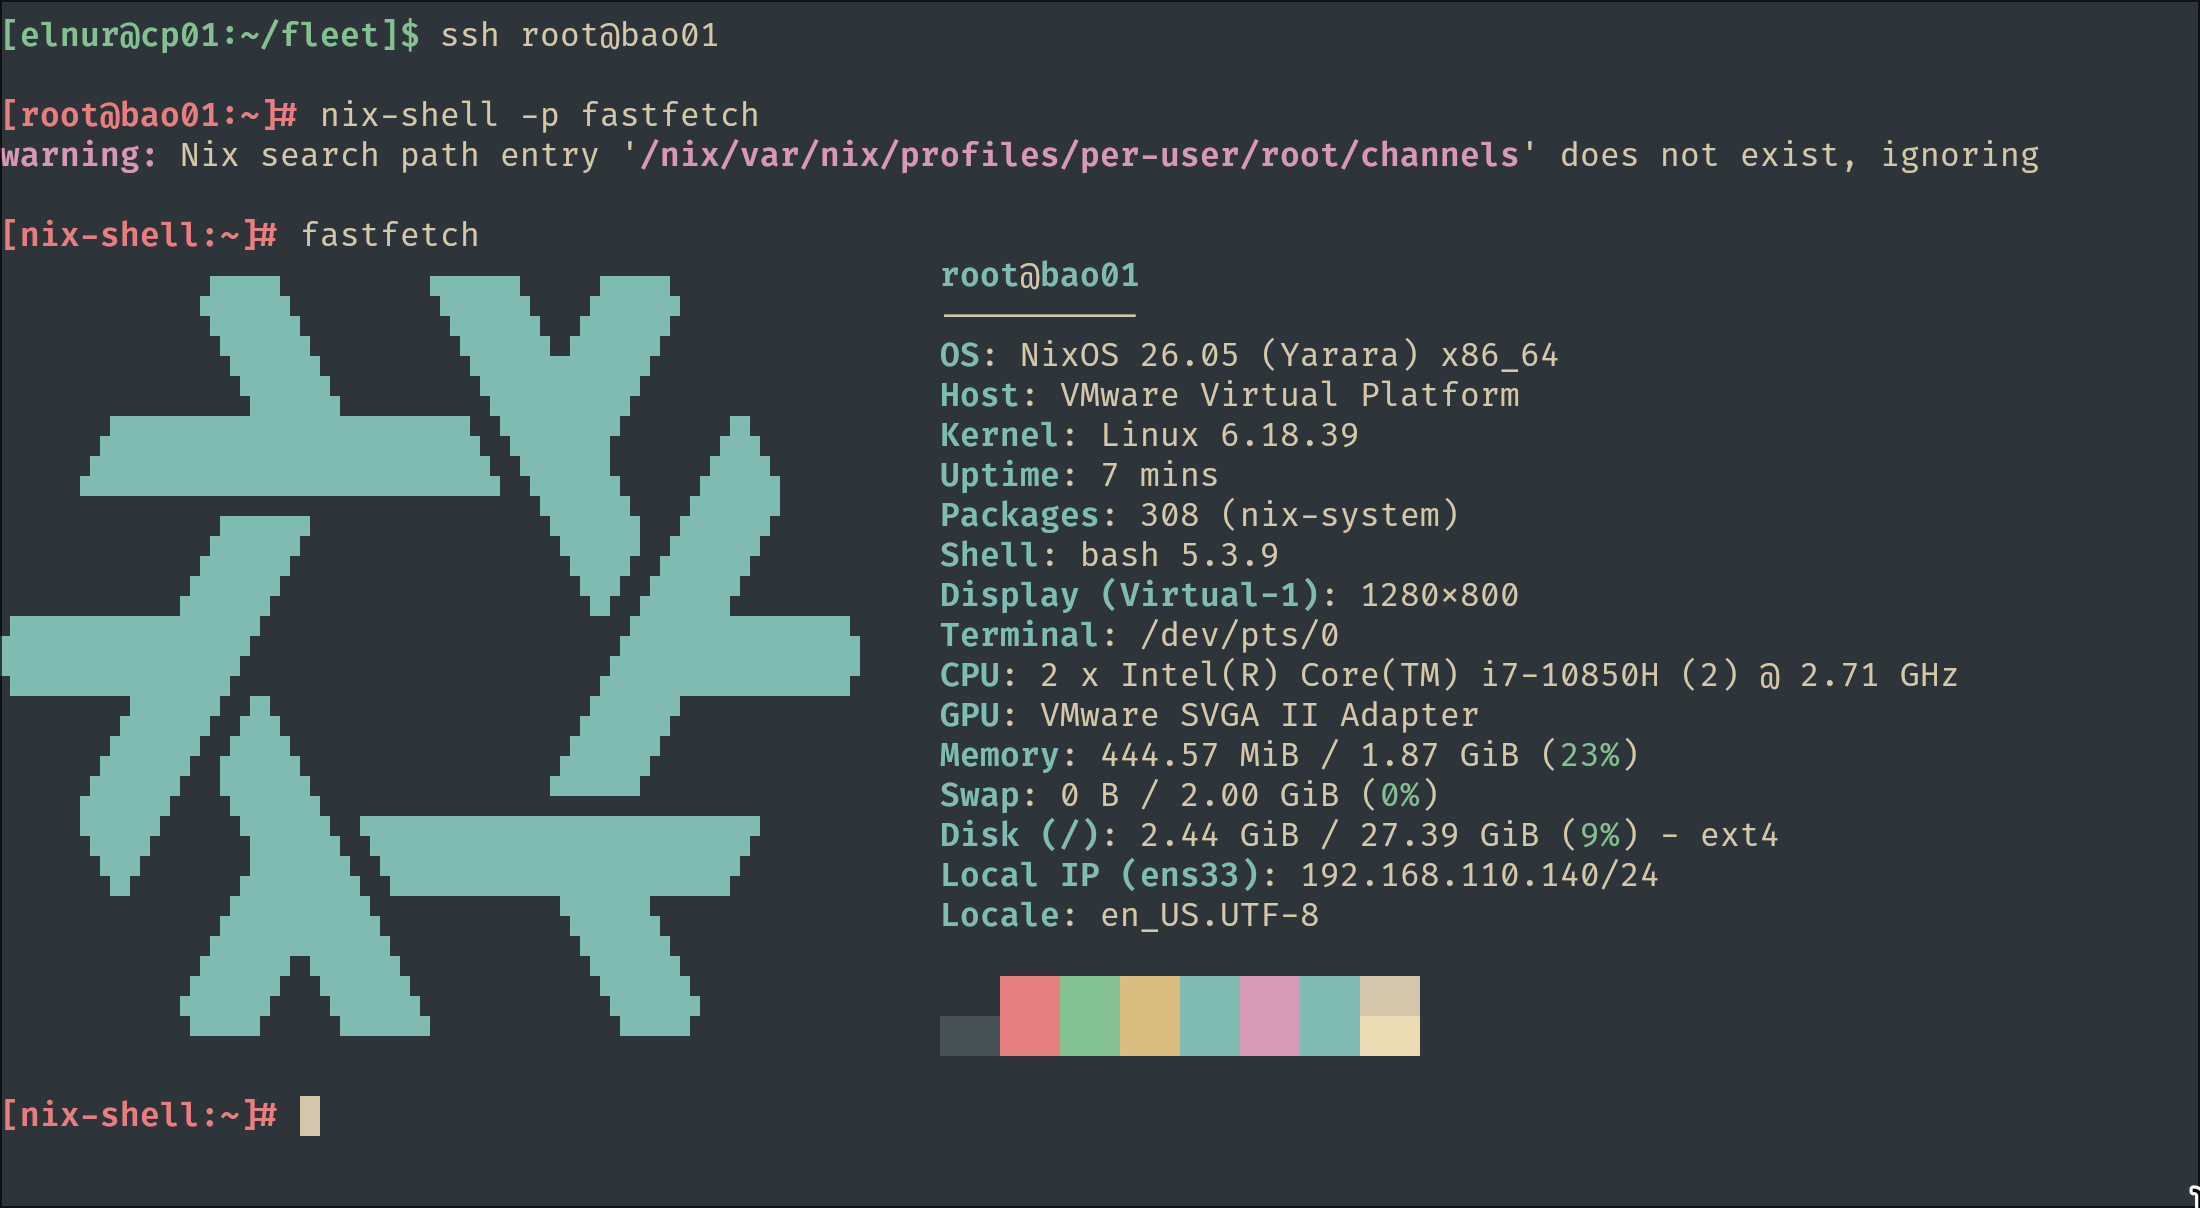
As a result, we have a single-instance OpenBao running on a minimal NixOS build:
Pushing Changes
From now on, any change to bao01 goes through the push mechanism:
git add -A && git commit -m "change"
nixos-rebuild switch --flake .#bao01 --build-host localhost --target-host root@bao01
OpenBao HA Setup
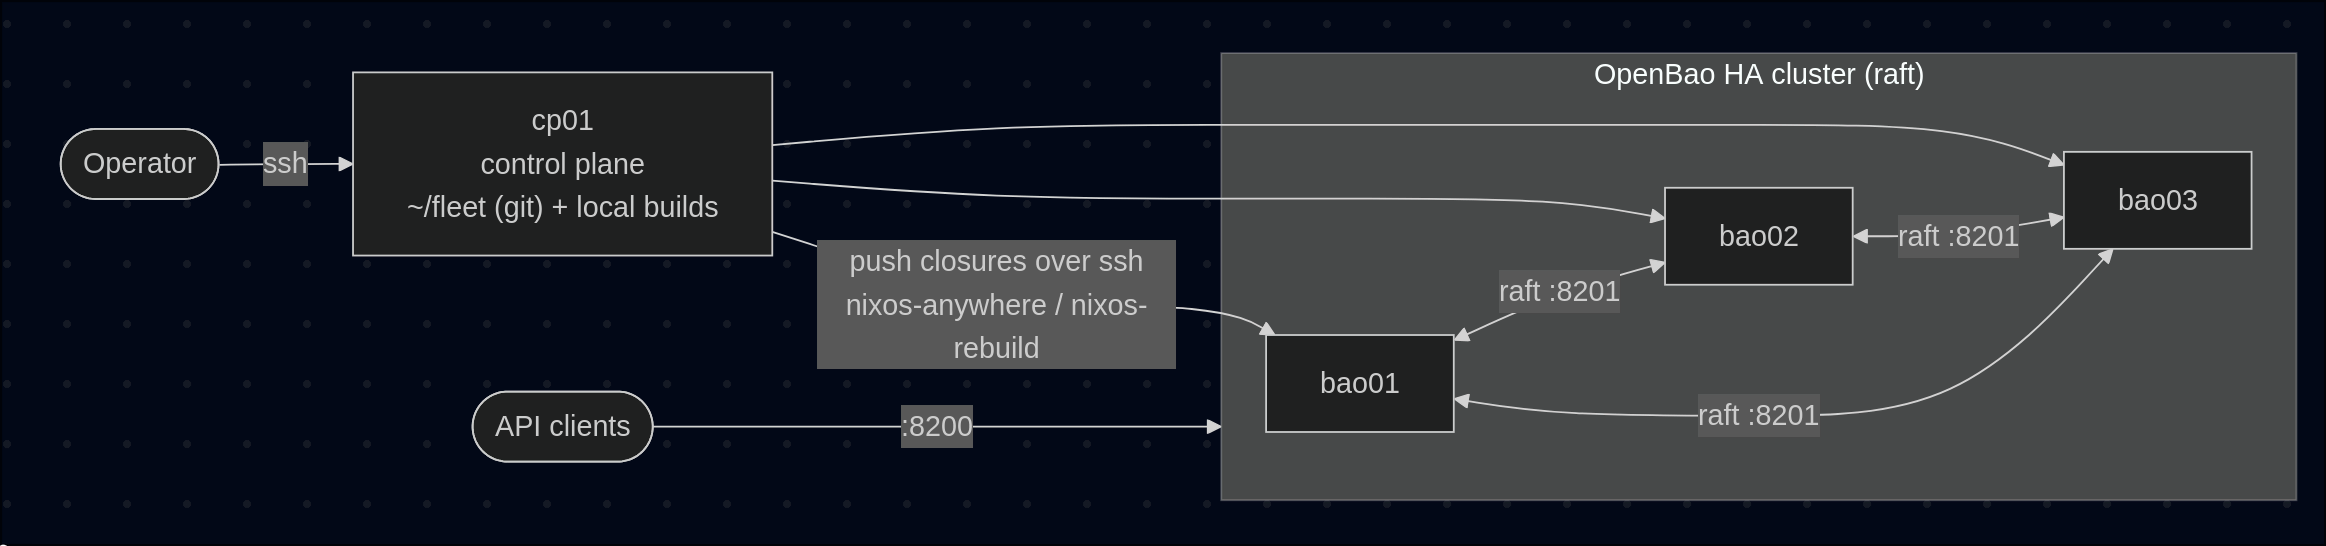
Everything again from cp01 in ~/fleet. bao02/bao03 are the last two clones, still in the live ISO with passwd nixos done.
Register the new nodes in the fleet
Extend networking.hosts in modules/base.nix:
networking.hosts = {
    "192.168.110.139" = [ "cp01" ];
    "192.168.110.140" = [ "bao01" ];
    "192.168.110.141" = [ "bao02" ];
    "192.168.110.142" = [ "bao03" ];
  };
Host stubs, same shape as bao01:
mkdir -p hosts/{bao02,bao03}
for h in bao02 bao03; do
cat > hosts/$h/default.nix <<EOF
{ ... }:
{
  networking.hostName = "$h";
  boot.loader.grub.enable = true;   # disko supplies grub.devices via the EF02 partition
}
EOF
done
Hardware configs from the remotes:
ssh [email protected] "sudo nixos-generate-config --no-filesystems --show-hardware-config" > hosts/bao02/hardware-configuration.nix
ssh [email protected] "sudo nixos-generate-config --no-filesystems --show-hardware-config" > hosts/bao03/hardware-configuration.nix
Teach the OpenBao module to cluster
The only change in modules/openbao.nix is retry_join inside the raft stanza. Every node lists all peers (a node skips itself), so the module stays identical across all three hosts, since node_id, api_addr and cluster_addr already derive from the hostname:
{ config, ... }:
{
  services.openbao = {
    enable = true;
    settings = {
      ui = true;

      listener.default = {
        type = "tcp";
        address = "0.0.0.0:8200";
        tls_disable = true;   # lab only
      };

      api_addr = "http://${config.networking.hostName}:8200";
      cluster_addr = "http://${config.networking.hostName}:8201";

      storage.raft = {
        path = "/var/lib/openbao";
        node_id = config.networking.hostName;
        retry_join = [
          { leader_api_addr = "http://bao01:8200"; }
          { leader_api_addr = "http://bao02:8200"; }
          { leader_api_addr = "http://bao03:8200"; }
        ];
      };
    };
  };

  networking.firewall.allowedTCPPorts = [ 8200 8201 ];
}
Note: The raft cluster traffic on 8201 is always TLS: OpenBao generates its own certificates for the cluster port internally, independent of
tls_disableon the API listener.
Deduplicate the flake
Three identical target definitions is the moment to introduce a helper, flake.nix:
{
  description = "NixOS fleet";

  inputs = {
    nixpkgs.url = "github:NixOS/nixpkgs/nixos-26.05";
    disko = {
      url = "github:nix-community/disko";
      inputs.nixpkgs.follows = "nixpkgs";
    };
  };

  outputs = { self, nixpkgs, disko }:
    let
      mkBao = name: nixpkgs.lib.nixosSystem {
        system = "x86_64-linux";
        modules = [
          disko.nixosModules.disko
          ./modules/base.nix
          ./hosts/${name}
          ./hosts/${name}/hardware-configuration.nix
          ./modules/disko-vm.nix
          ./modules/openbao.nix
        ];
      };
    in {
      nixosConfigurations = {
        cp01 = nixpkgs.lib.nixosSystem {
          system = "x86_64-linux";
          modules = [ ./modules/base.nix ./hosts/cp01 ];
        };

        bao01 = mkBao "bao01";
        bao02 = mkBao "bao02";
        bao03 = mkBao "bao03";
      };
    };
}
Roll out to the existing hosts
git add -A && git commit -m "ha: add bao02/bao03, raft retry_join"
sudo nixos-rebuild switch --flake .#cp01   # cp01 needs the new /etc/hosts entries too
nixos-rebuild switch --flake .#bao01 --build-host localhost --target-host root@bao01
bao01 keeps serving through this: the unit does not restart on switch, and retry_join only matters to nodes that are joining anyway. The new config lands on disk for any future restart.
Install bao02 and bao03
ssh-copy-id [email protected]
ssh-copy-id [email protected]
nix run github:nix-community/nixos-anywhere -- --flake .#bao02 --target-host [email protected] --build-on local
nix run github:nix-community/nixos-anywhere -- --flake .#bao03 --target-host [email protected] --build-on local
ssh-keygen -R 192.168.110.141 && ssh-keygen -R bao02
ssh-keygen -R 192.168.110.142 && ssh-keygen -R bao03
Join and unseal the new nodes
On boot, each new node uses retry_join to issue a join challenge to the leader, then waits sealed. Answering the challenge requires unsealing with the existing cluster keys, the same 3 of 5 from operator init (there is no new init on followers):
nix shell nixpkgs#openbao
BAO_ADDR=http://bao02:8200 bao operator unseal   # run 3 times
BAO_ADDR=http://bao02:8200 bao status
BAO_ADDR=http://bao03:8200 bao operator unseal   # run 3 times
BAO_ADDR=http://bao03:8200 bao status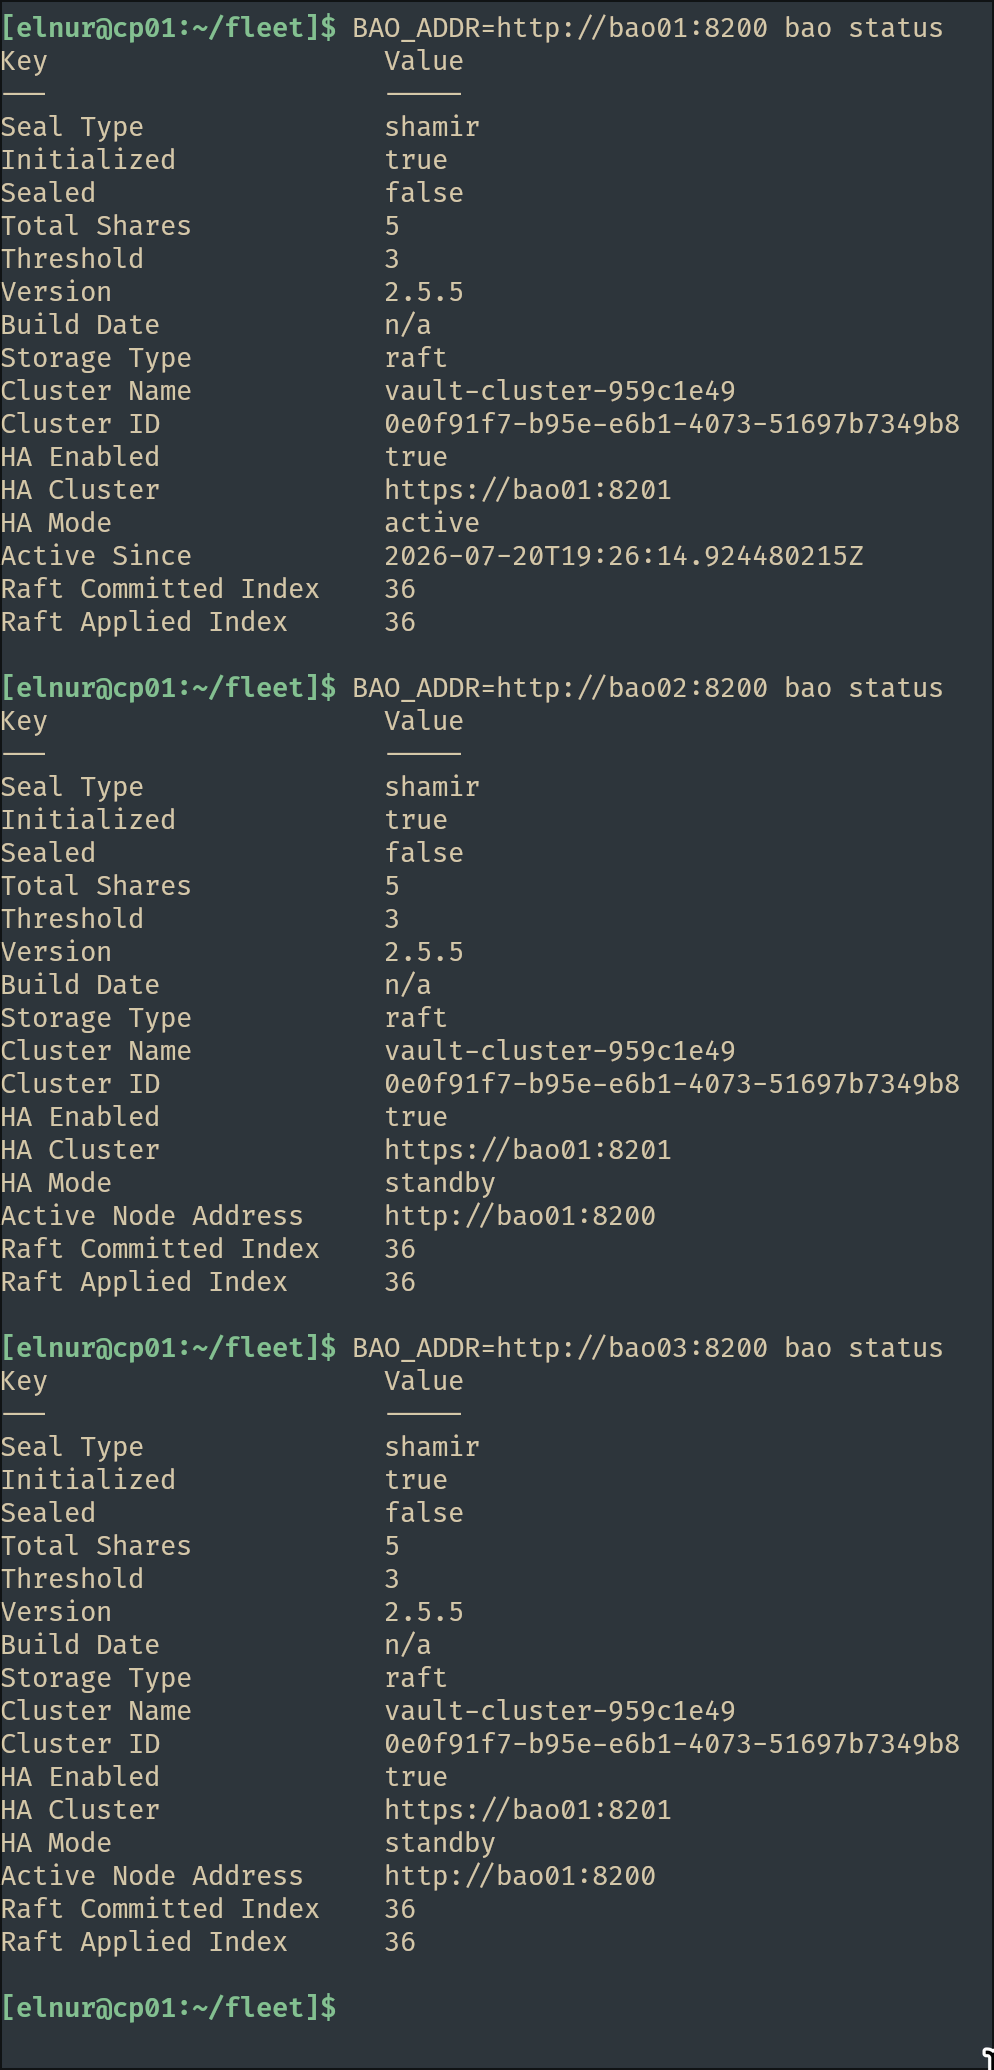
Verify the cluster
export BAO_ADDR=http://bao01:8200
bao login                        # root token
bao operator raft list-peers     # expect bao01 leader, bao02/bao03 followers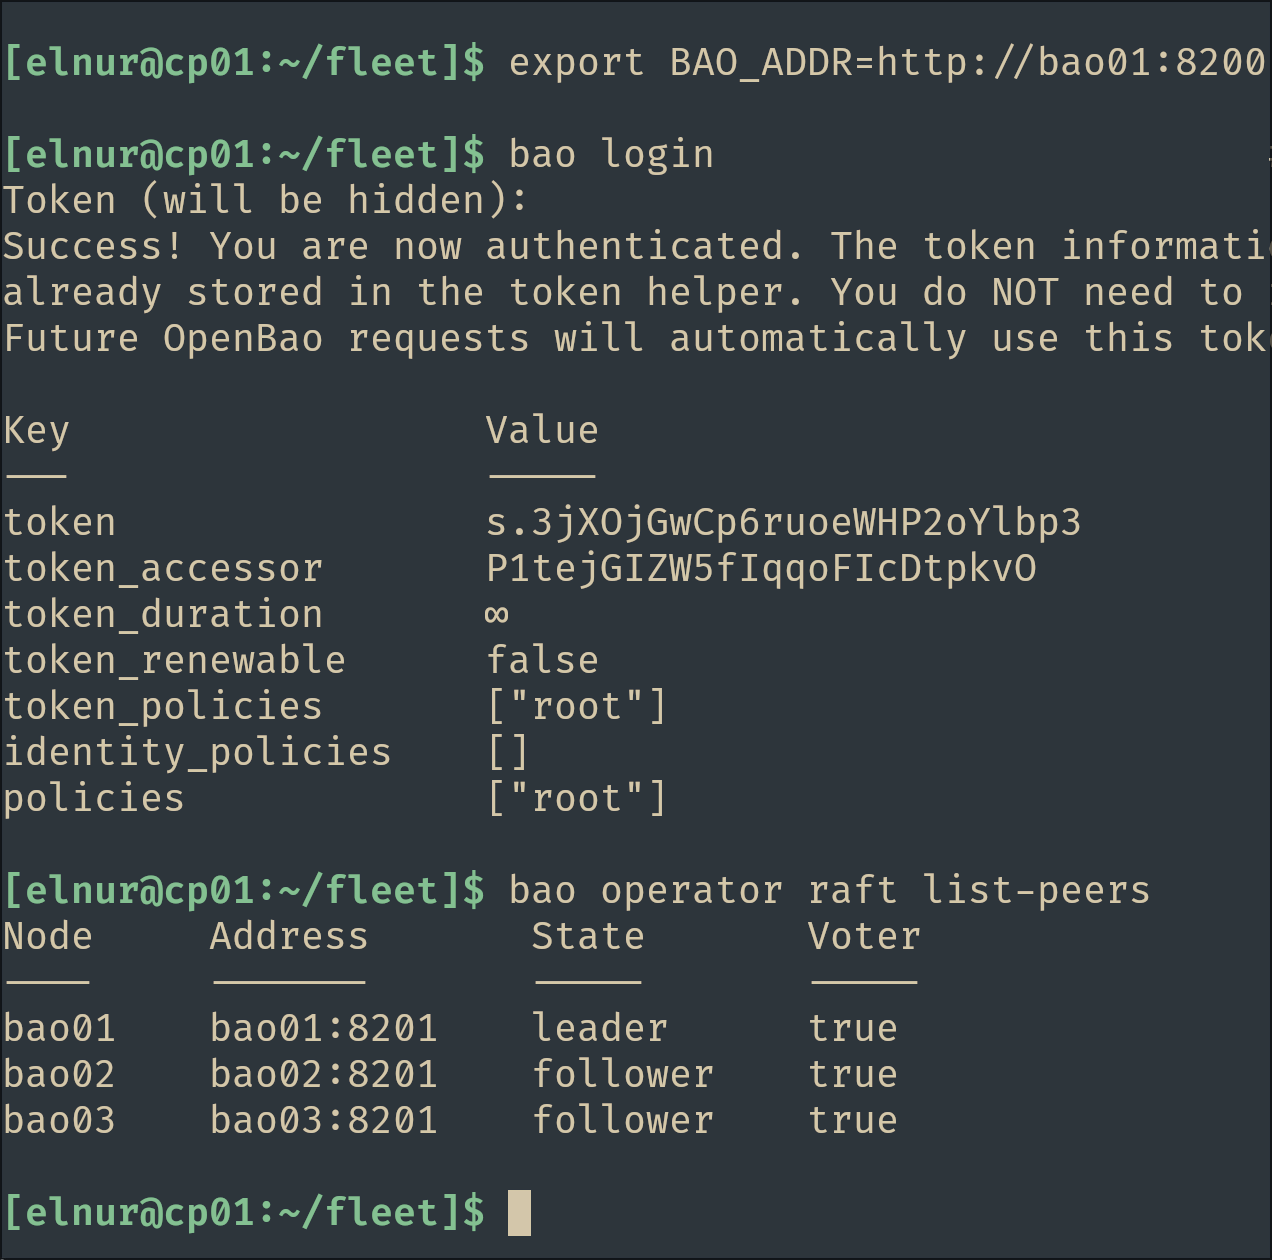
Failover test: stop the leader, quorum (2 of 3) elects a new one:
ssh root@bao01 systemctl stop openbao
BAO_ADDR=http://bao02:8200 bao status   # check ha_mode; one of bao02/bao03 is now active
ssh root@bao01 systemctl start openbao
BAO_ADDR=http://bao01:8200 bao operator unseal   # run 3 times; bao01 rejoins as standby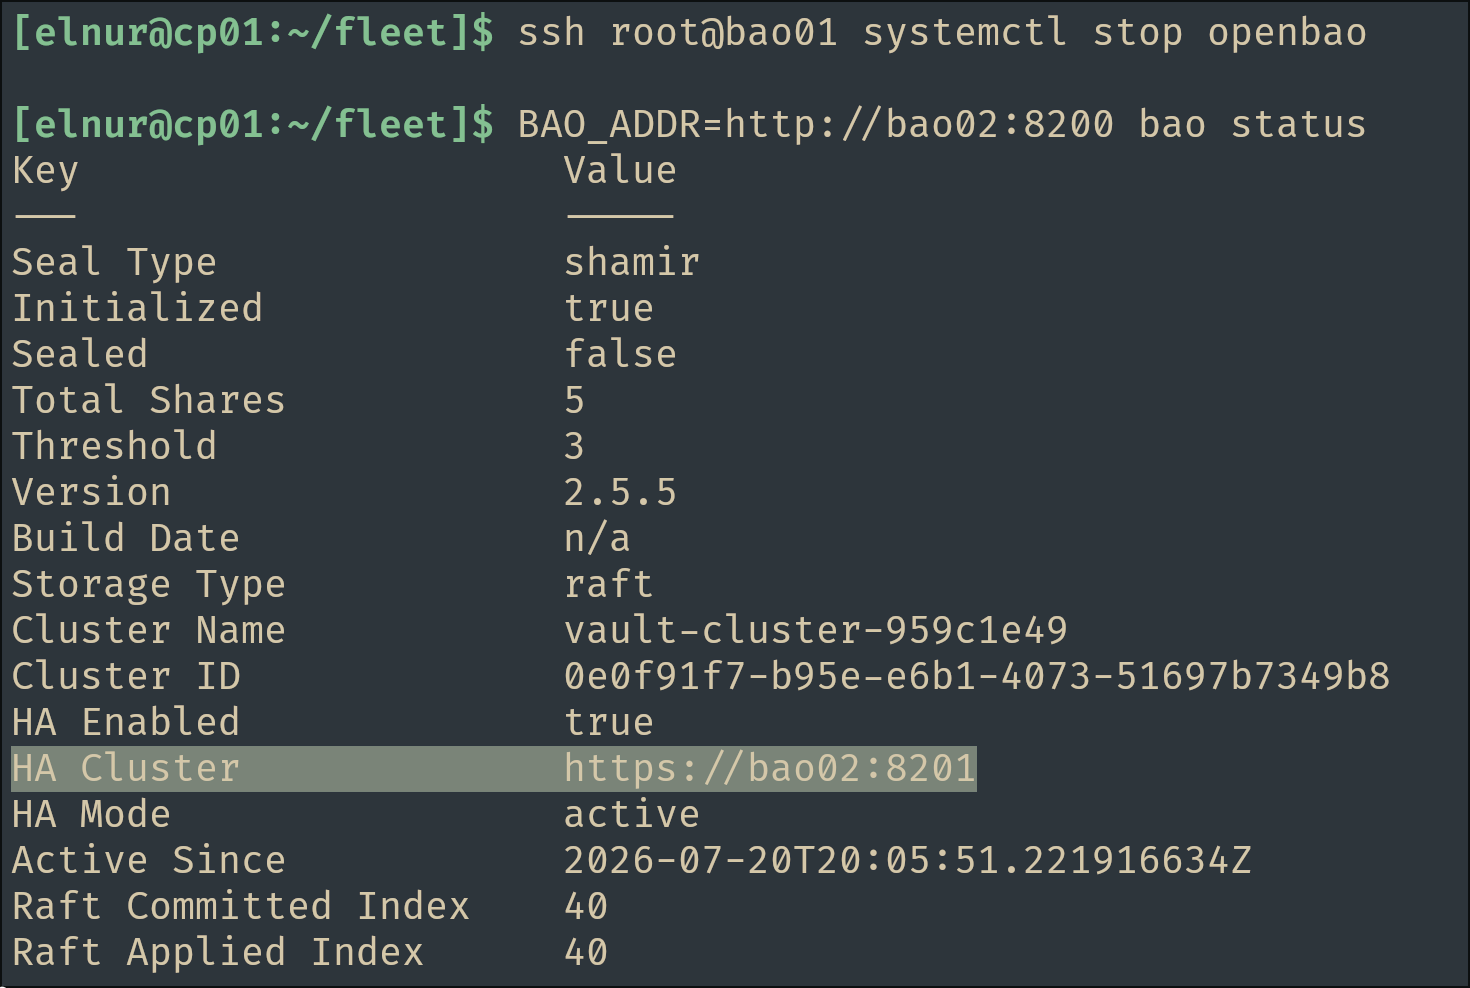
And even after unsealing the bao01, the leader will not change back:
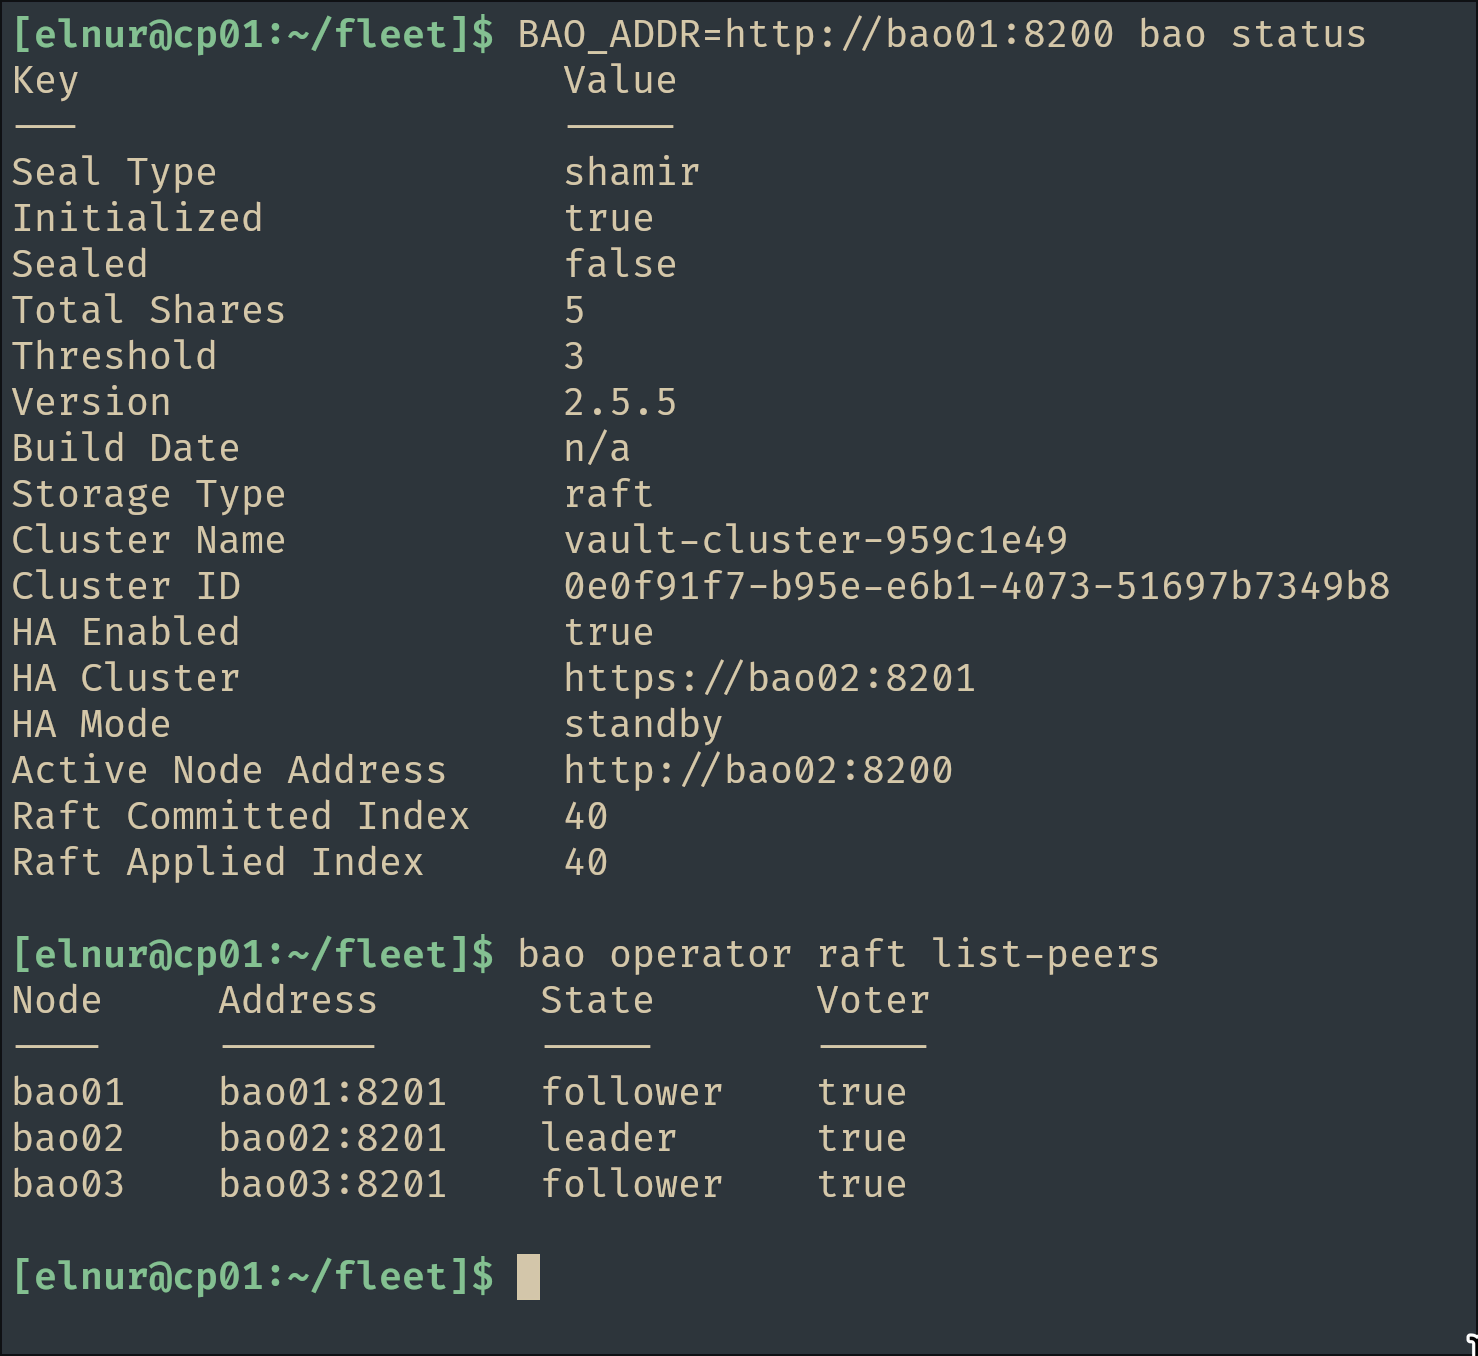
That last unseal is the operational cost of Shamir seals: any restarted node comes back sealed and needs manual unsealing. In production you would move to auto-unseal (KMS or transit).
Conclusion
The control plane was the only host we touched directly: it held the fleet in Git, built each system locally, and pushed it over SSH. On top of it, OpenBao went from a single declarative instance to a three-node raft cluster, and the failover test showed it keeps serving after the leader goes down. Every host - disks, hardware config, firewall, and OpenBao - is defined in ~/fleet, so adding or rebuilding a node is just another commit. The one manual step left is unsealing after a restart, which in production you would replace with auto-unseal (KMS or transit).
References
- NixOS: manual, nix.dev, wiki, option search
- disko - declarative disk partitioning
- nixos-anywhere - install NixOS over SSH
- OpenBao - integrated (raft) storage and high availability